Activating Microsoft Office / Project / Visio 2010: Step-by-Step Guide
For successful installation of Microsoft Office 2010, your operating system is crucial. We guide you through the steps for various Windows environments:
Steps to install Microsoft Office 2010 on Windows 8.1, 10, and 11
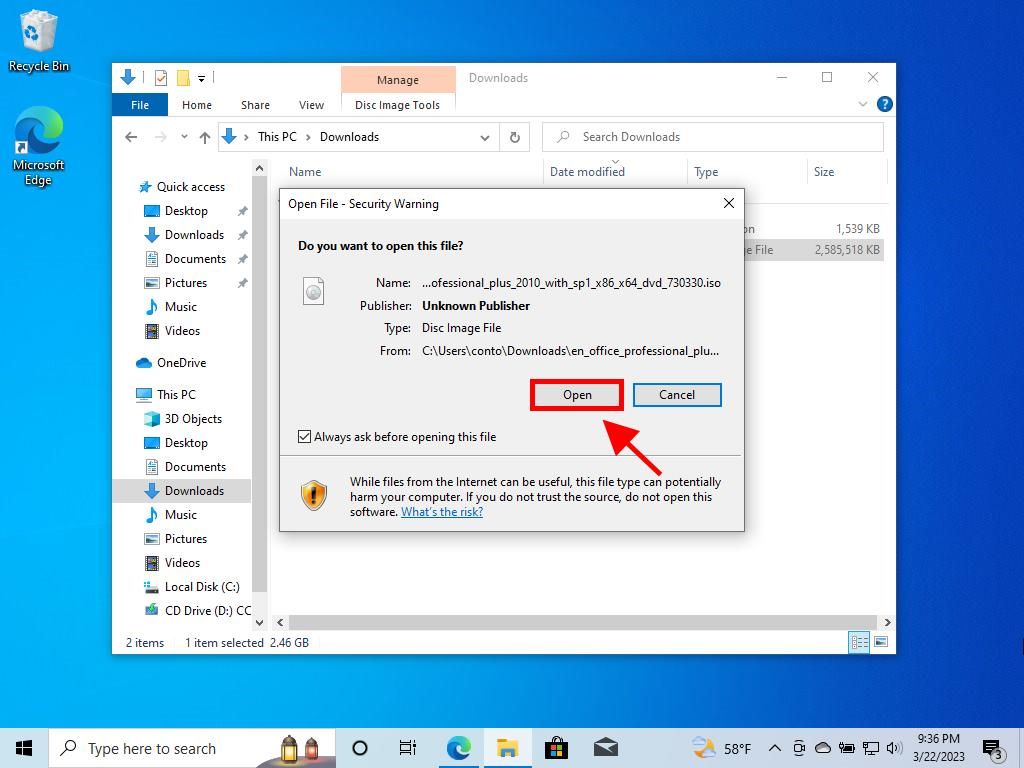
- After downloading the Microsoft Office 2010 .iso file, find the file and double-click. Select Open in the popup window.

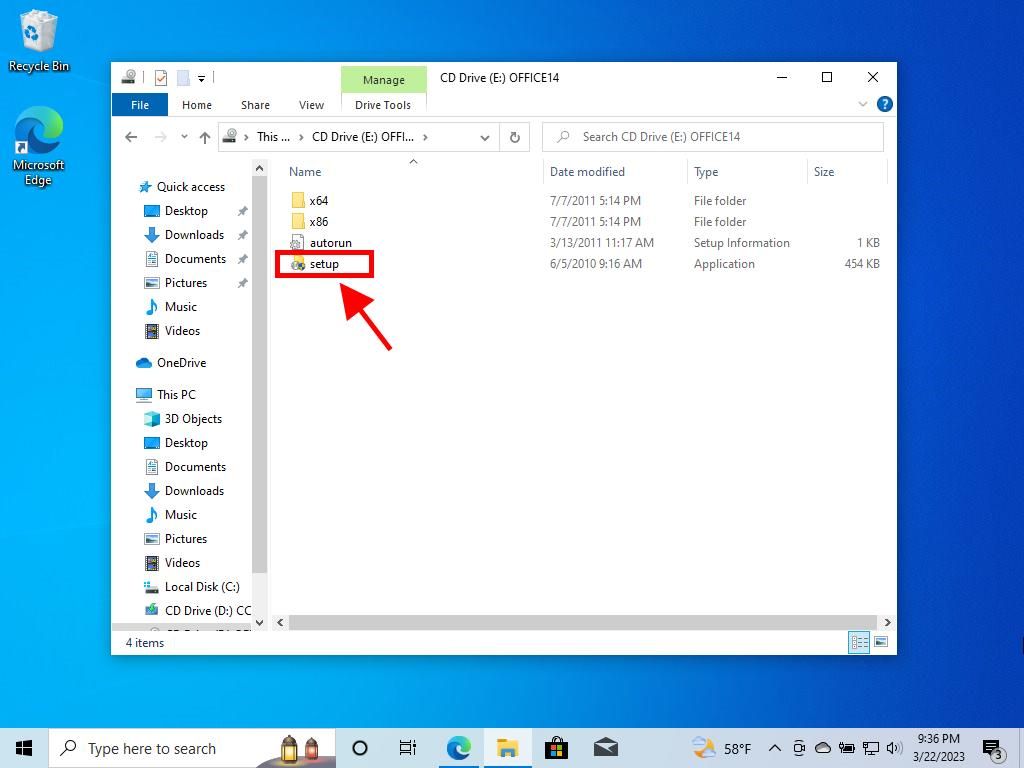
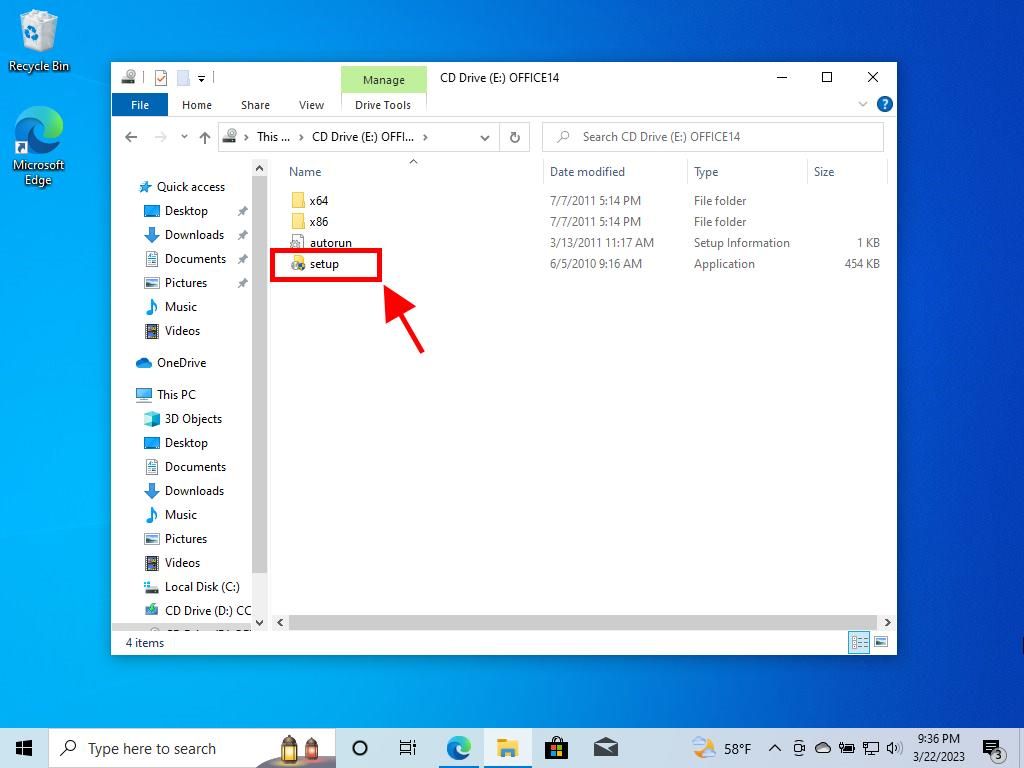
- In the new window, find and double-click the Setup file.

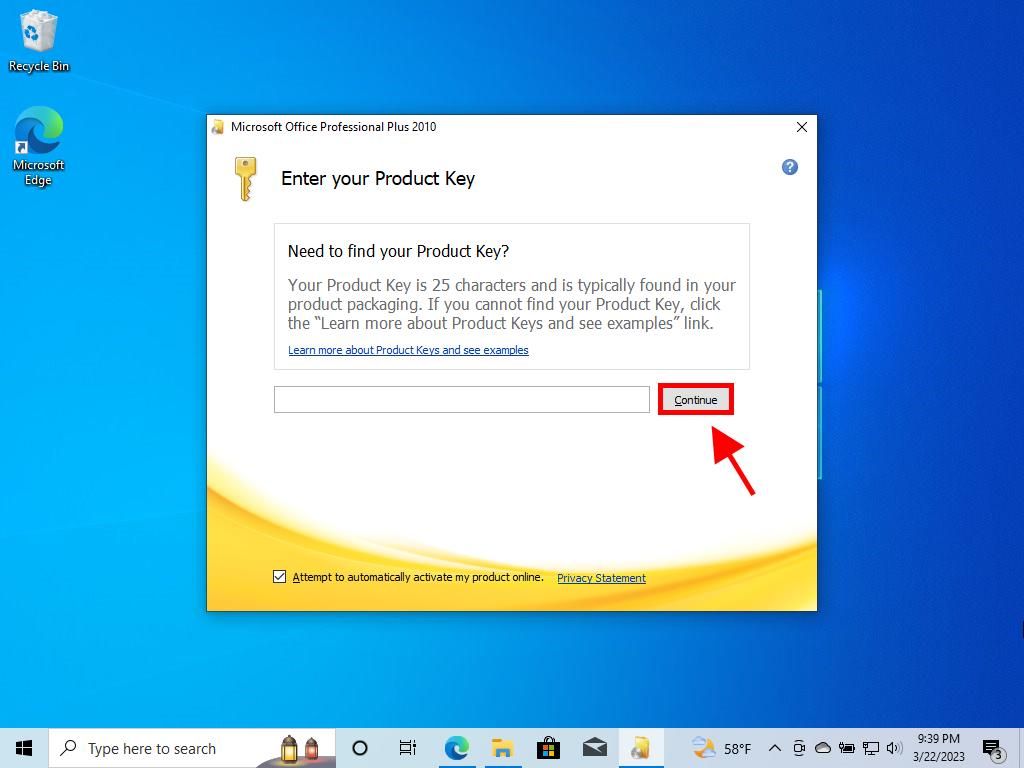
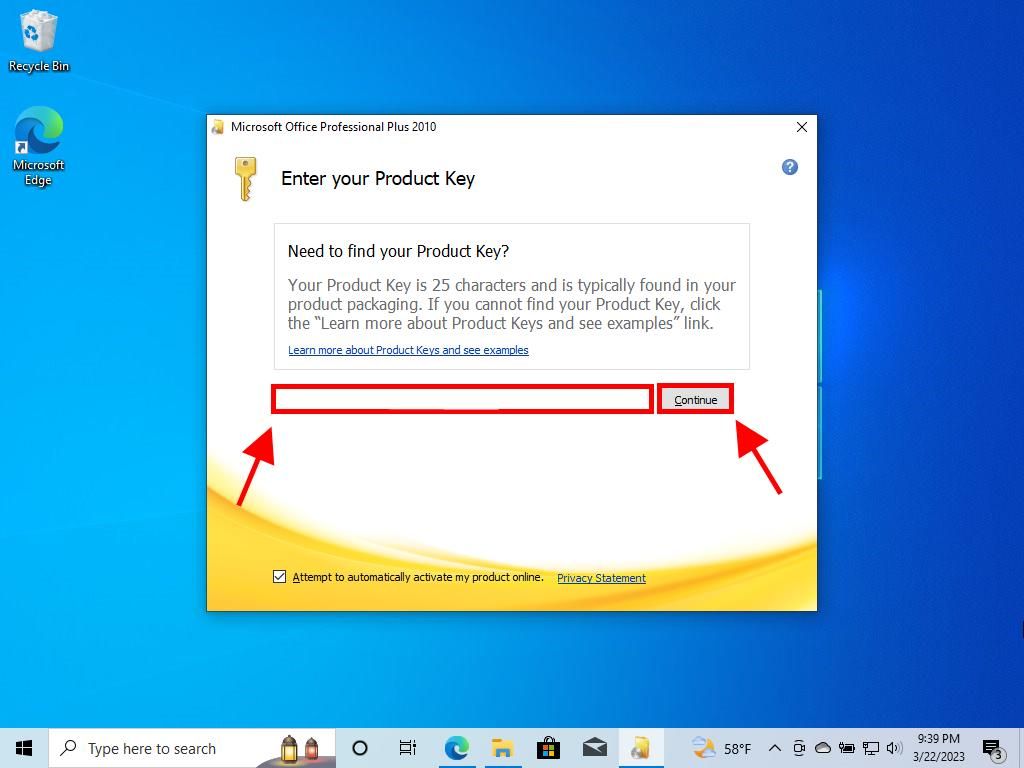
- Input your Microsoft product key and select Continue.

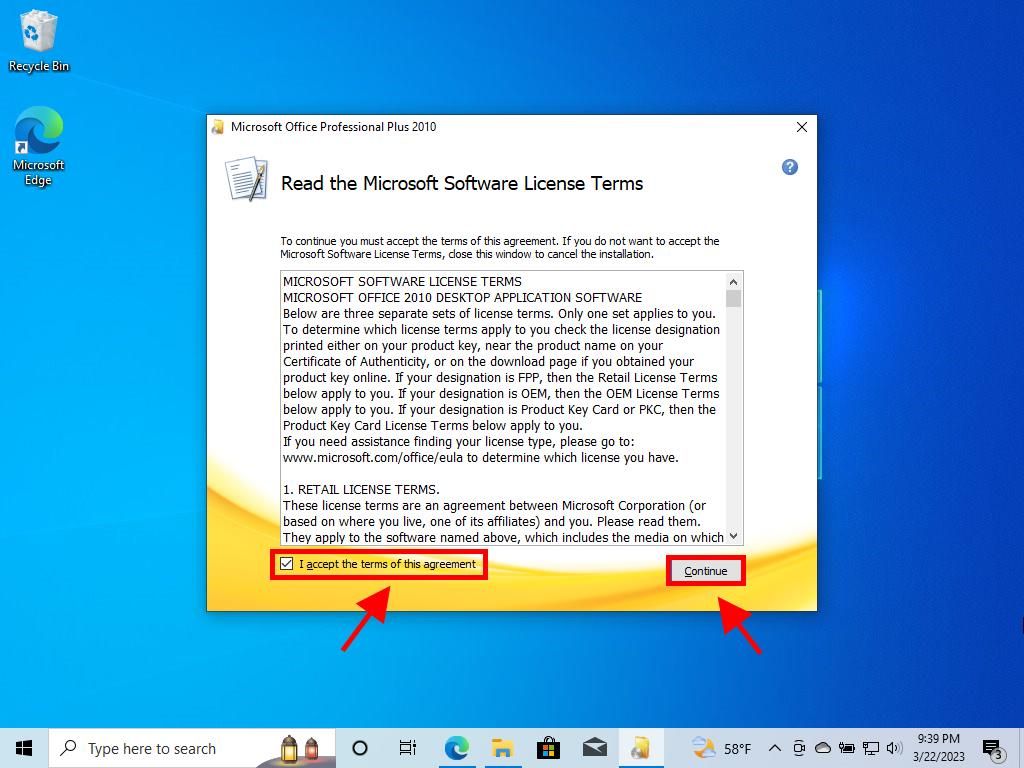
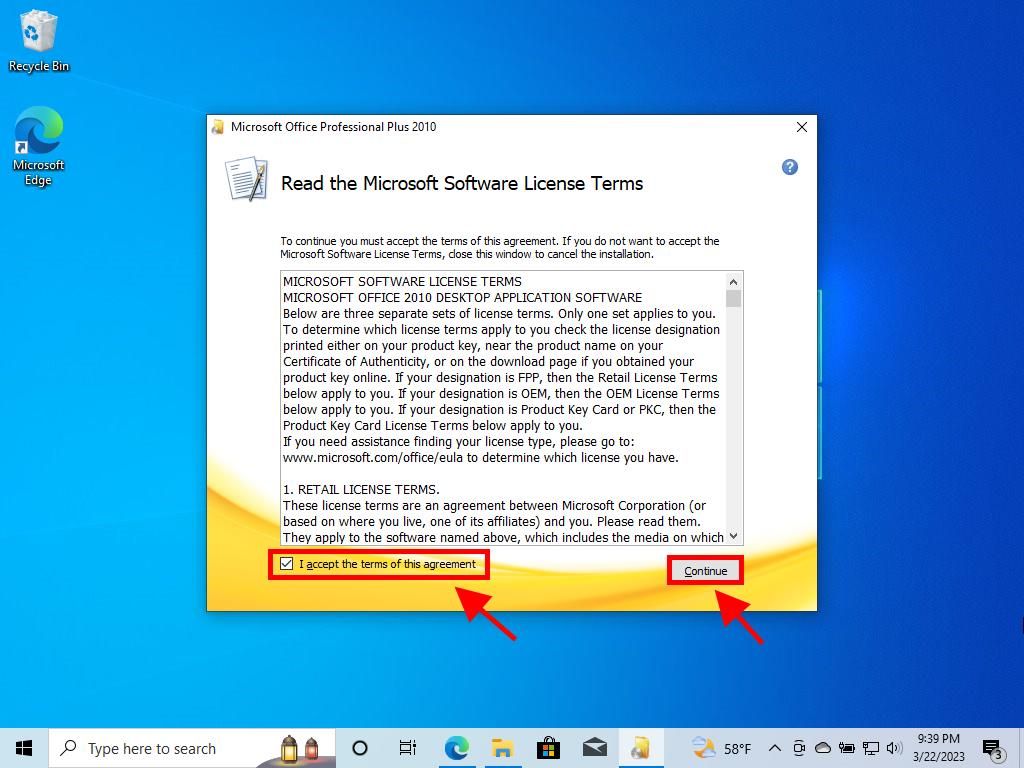
- Agree to the terms by ticking the checkbox, then press Continue.

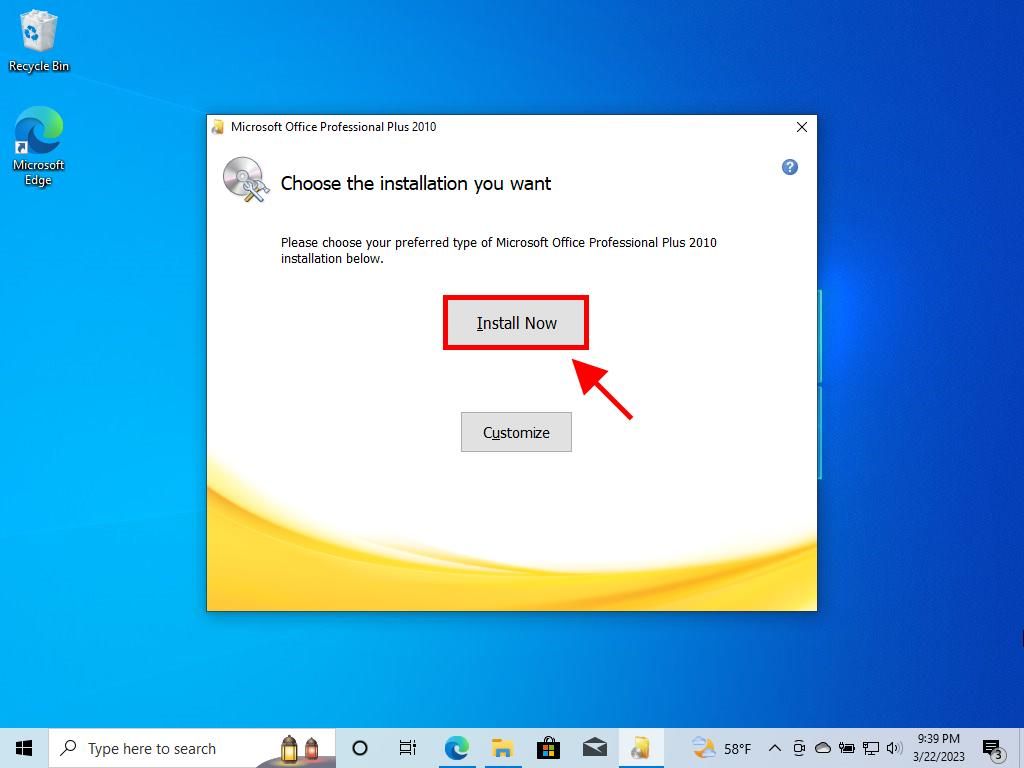
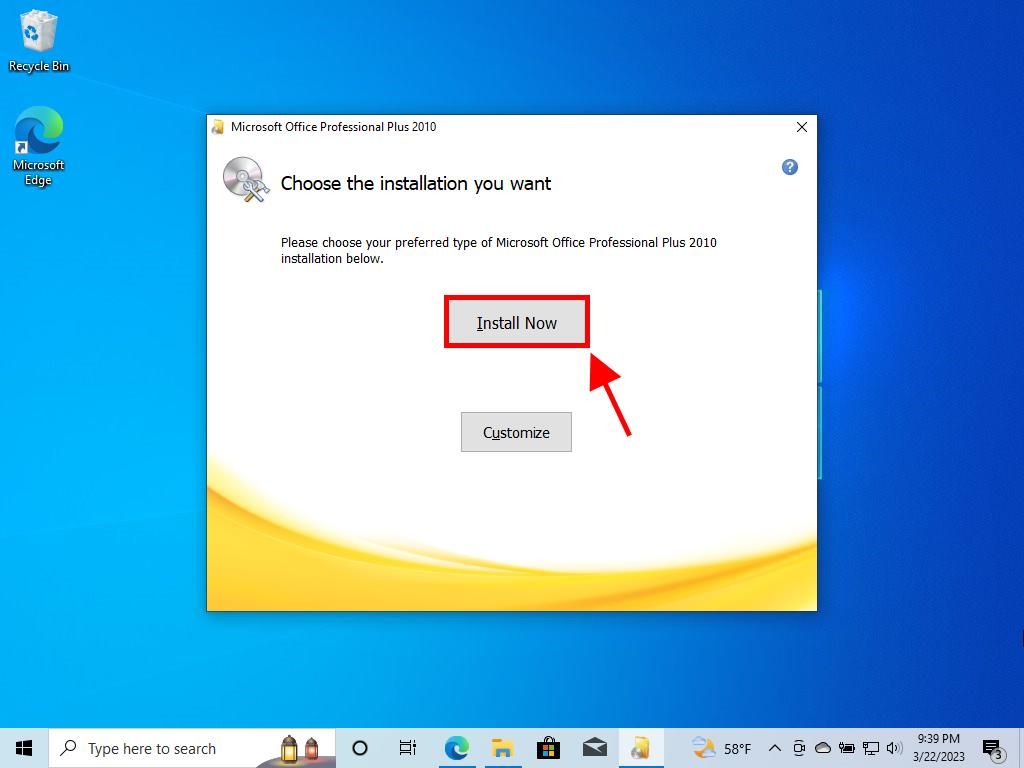
- Press Install now.

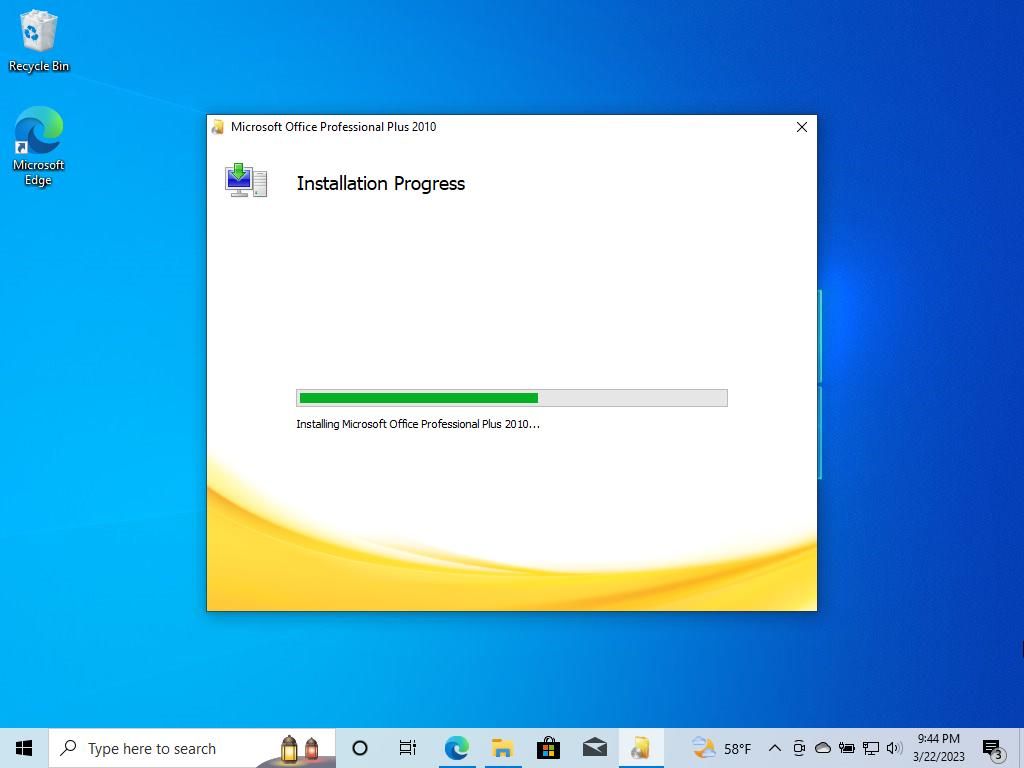
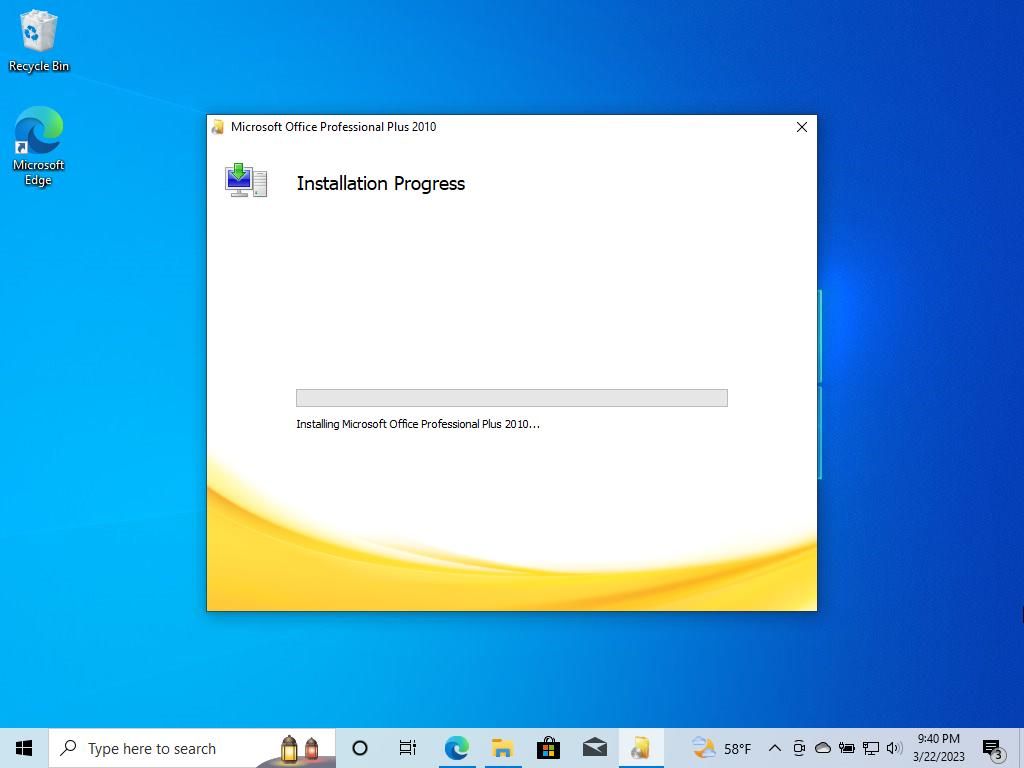
- Allow a few moments for the installation to complete.

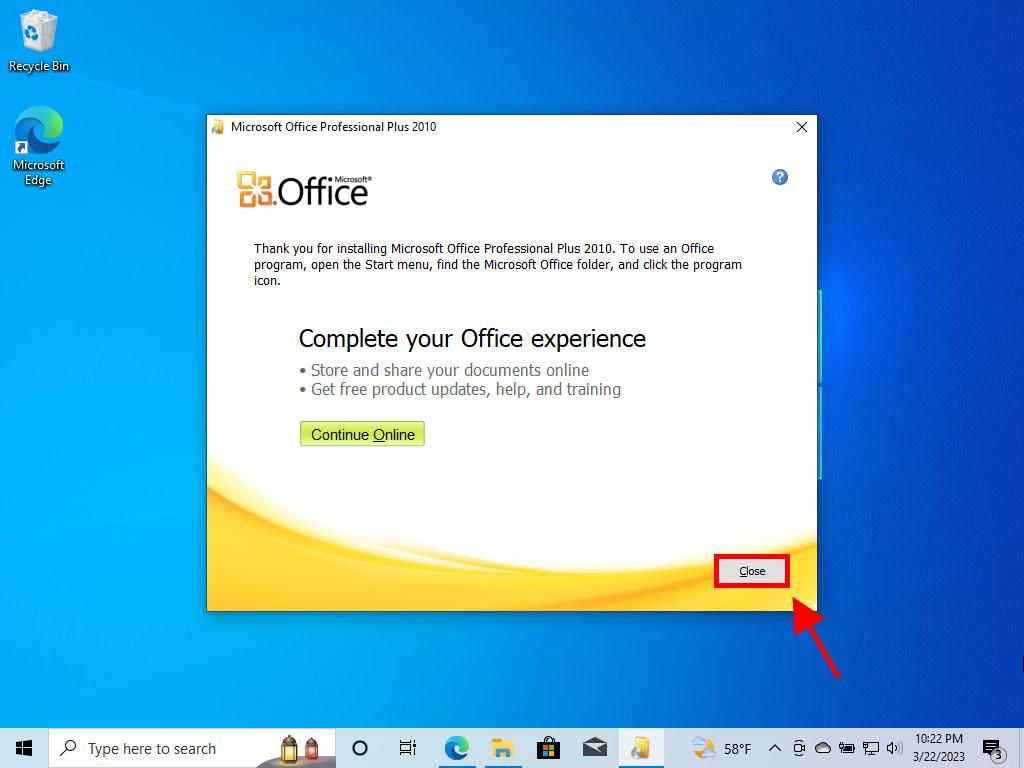
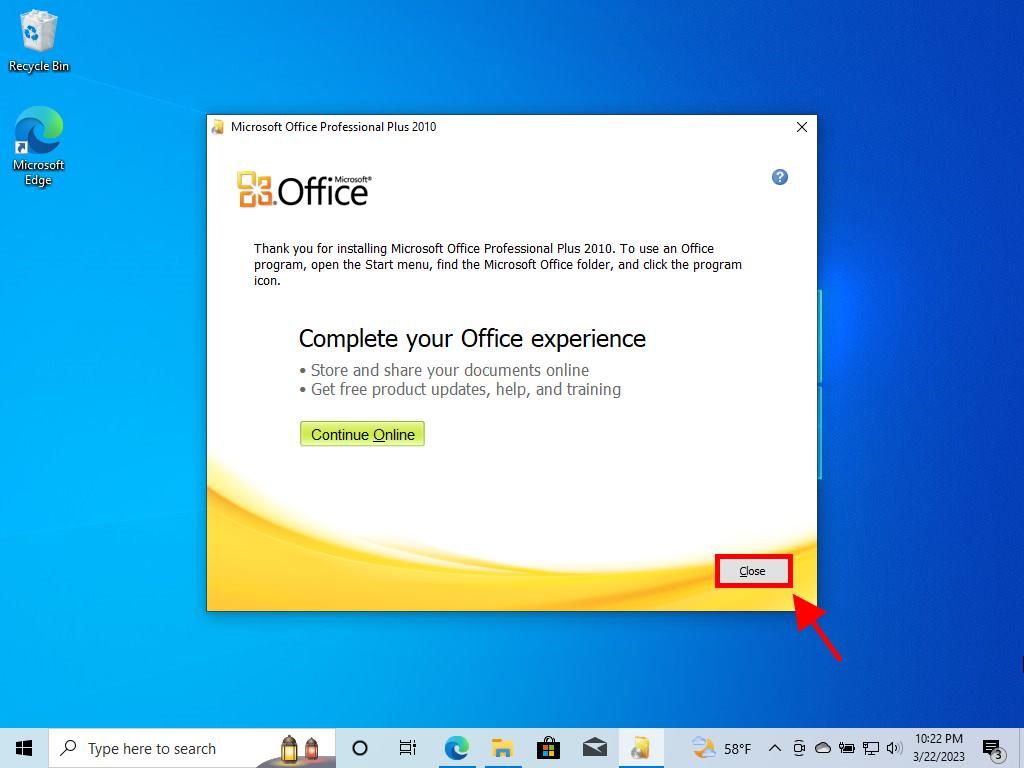
- Finally, select Close.

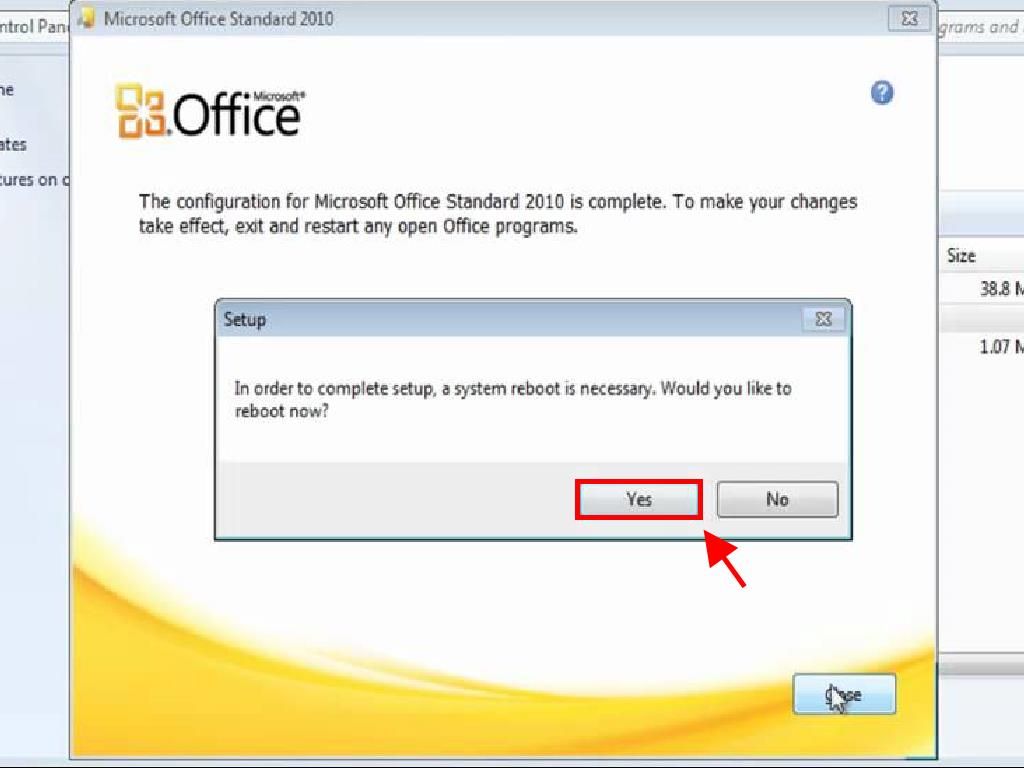
- Restart your computer as prompted to finalize the setup of Microsoft Office 2010.

- Once your PC reboots, your Microsoft Office 2010 will be fully installed and ready for use.
Guide for Installing Microsoft Office 2010 on Windows 7 and 8
Important: To install and activate Microsoft Office 2013 on Windows 7 and 8, ensure you have a file decompression tool like WinRAR, WinZip, or 7-Zip installed on your PC. We recommend using 7-Zip in this walkthrough.
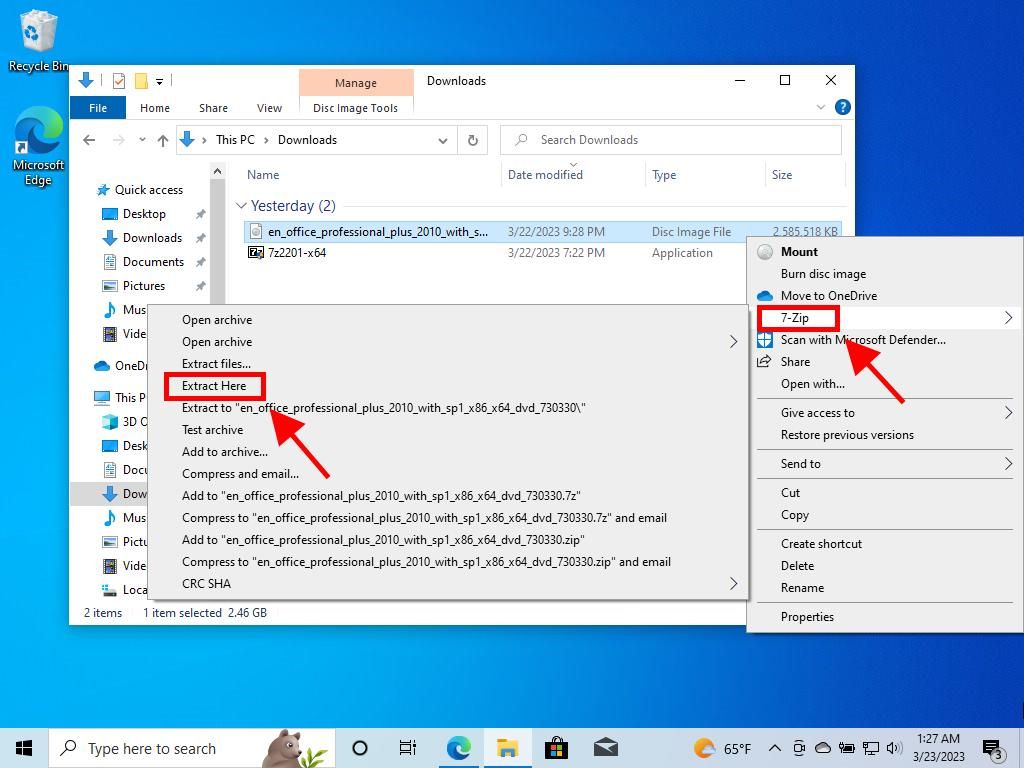
- Locate your downloaded Microsoft Office 2010 .iso file, right-click and choose 7-Zip, then select Extract here.

- Navigate to the extracted files and double-click the setup file to begin installation.

- Enter your Microsoft product key and select Continue.

- Agree to the terms by checking the box and clicking Continue.

- Press Install now.

- Allow a few moments for the installation to complete.

- Finally, select Close to finish the installation of your Microsoft Office 2010.

 Sign In / Sign Up
 Orders
 Product Keys
 Downloads

 Go to notfound