Setting Up Office / Project / Visio 2013 on Your Computer
Setting up Office 2013 involves understanding your PC's operating system specifics. We provide detailed steps for different Windows versions:
Steps to set up Office 2013 on Windows 8.1, 10, and 11
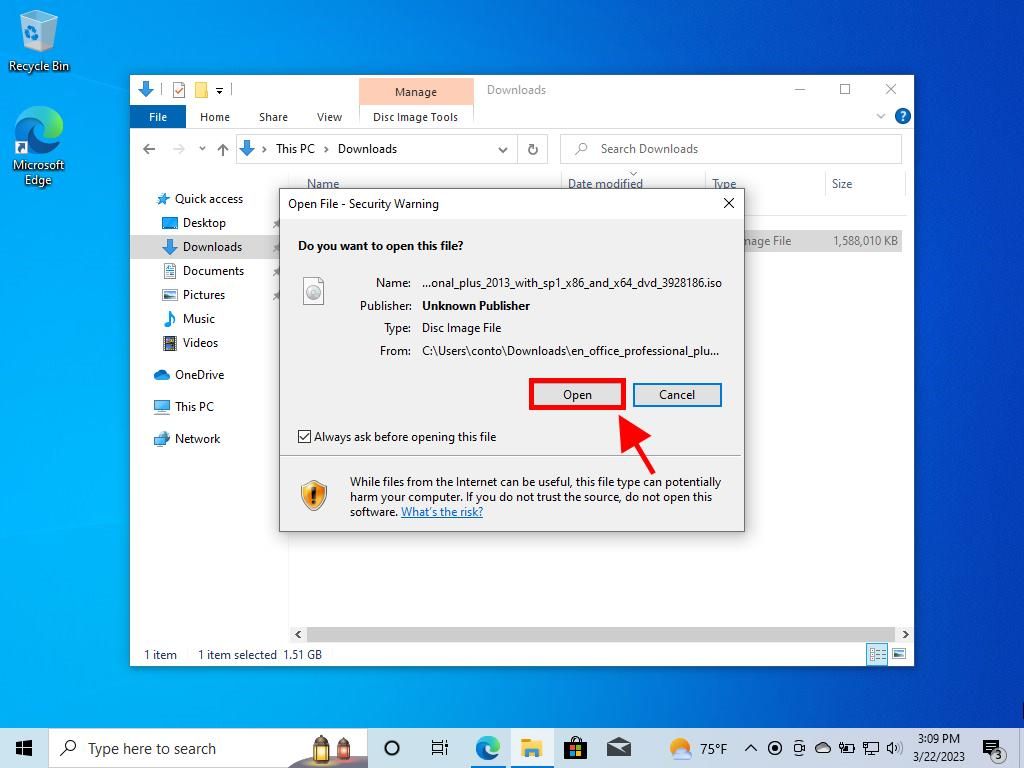
- After downloading the Office 2013 .iso file, locate it and double-click to open. In the window that appears, select Open.

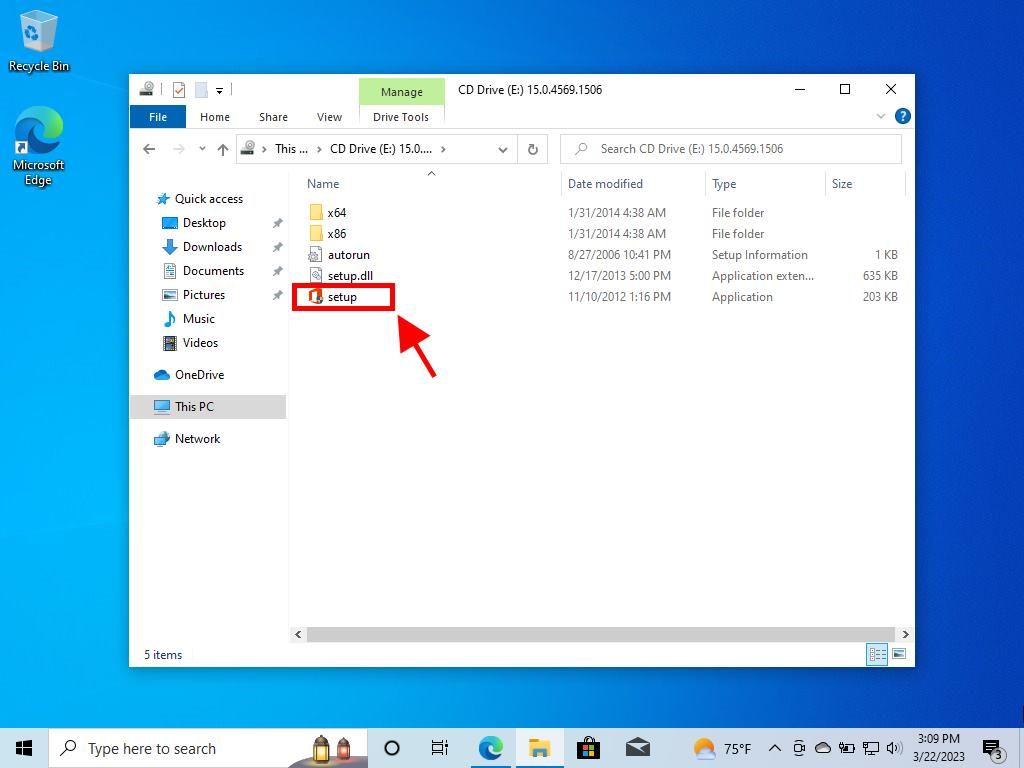
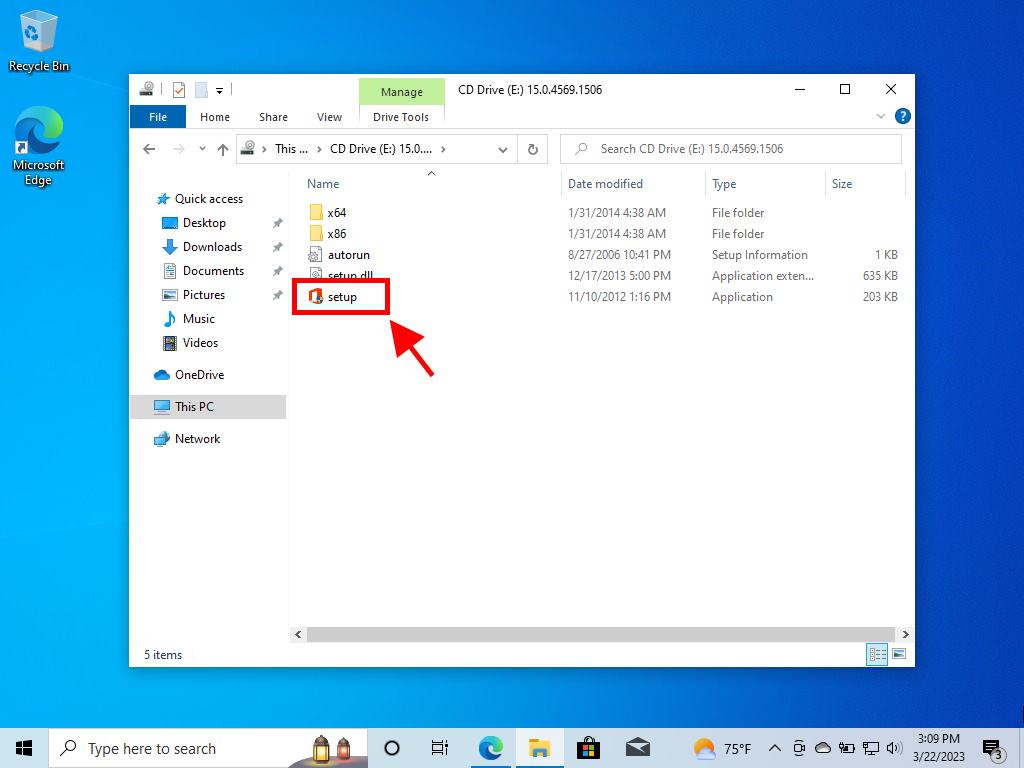
- A setup window will then appear; double-click on the Setup icon.

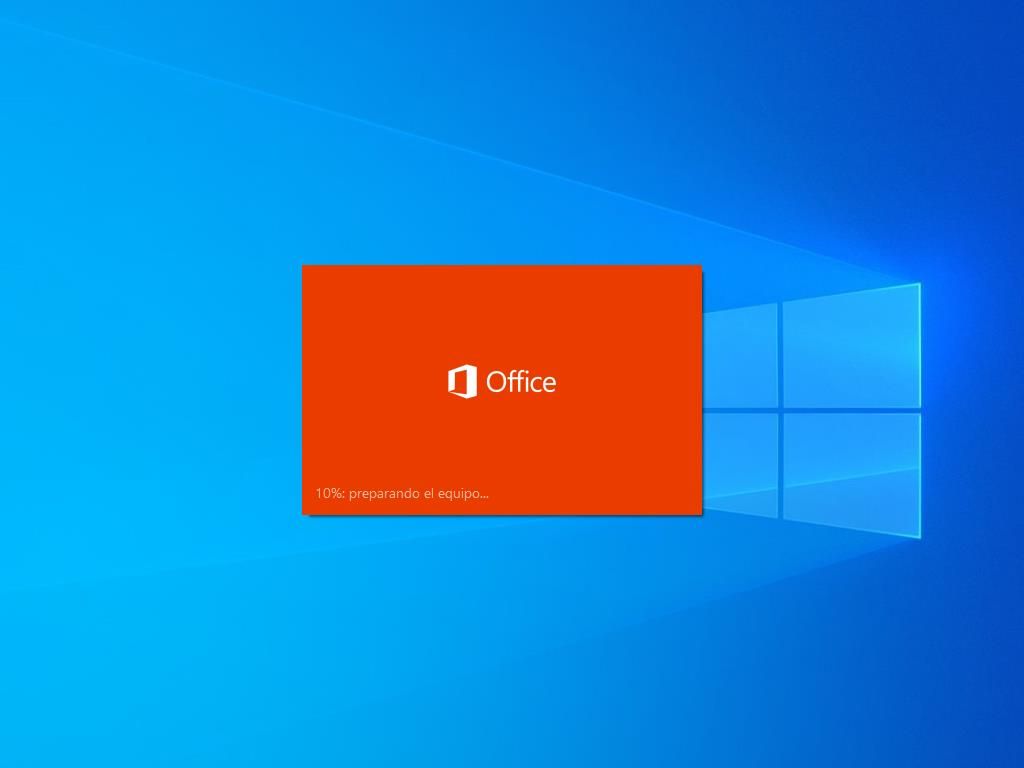
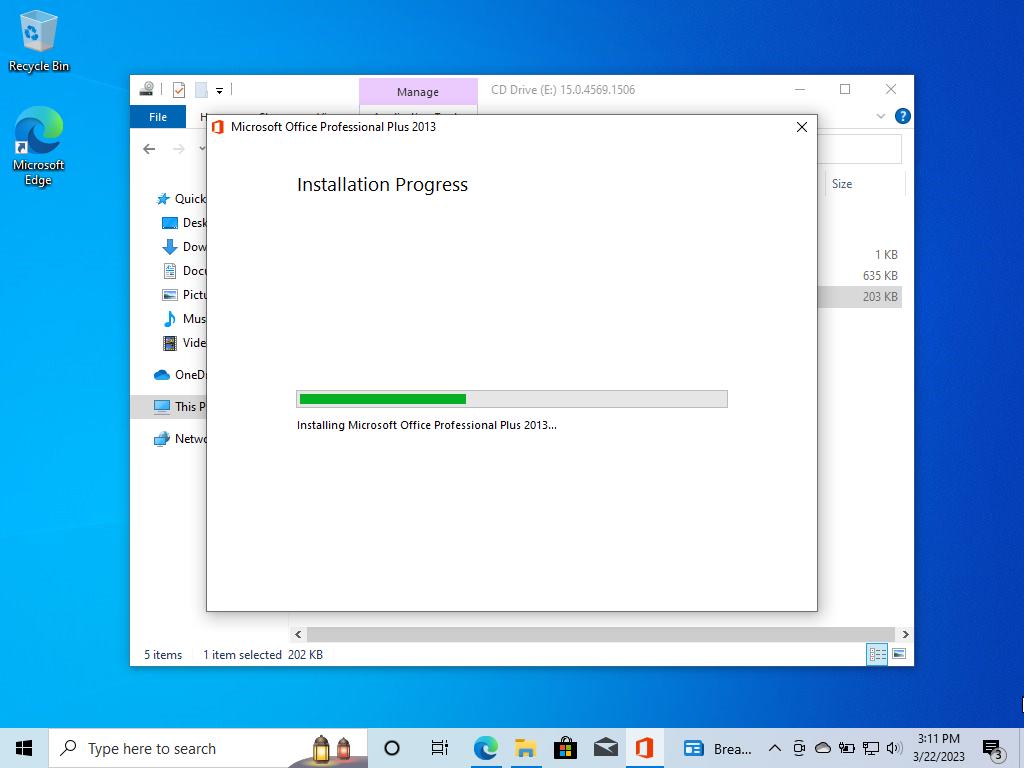
- Allow a few moments for the installation to complete.

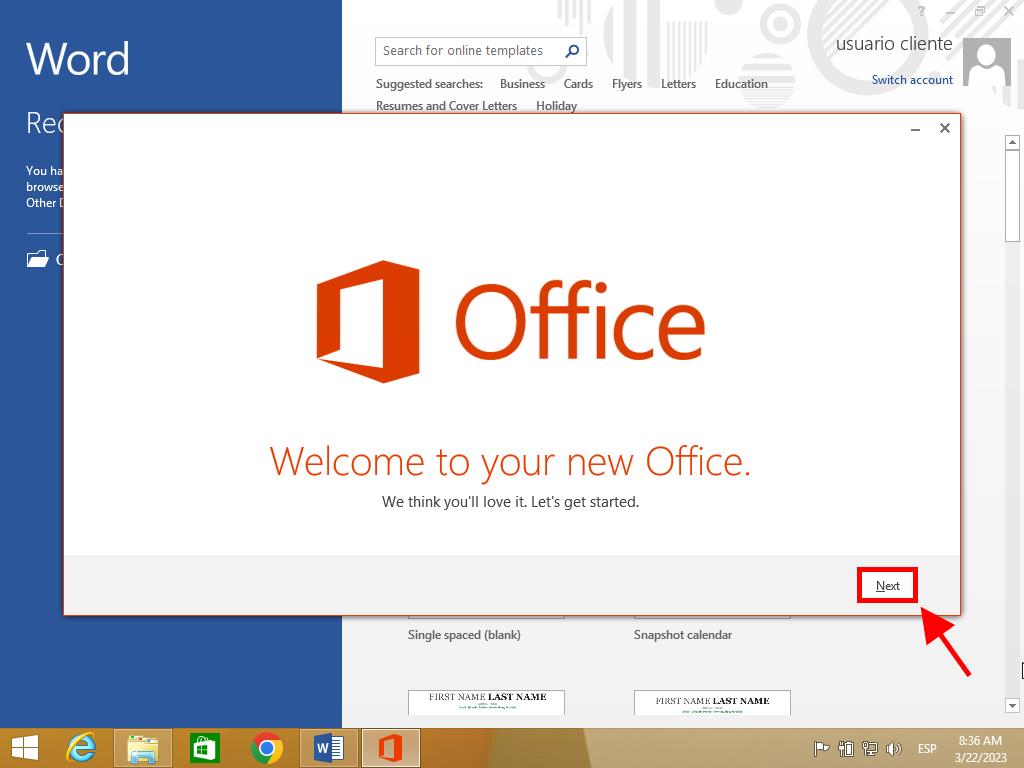
- Next, select Next.

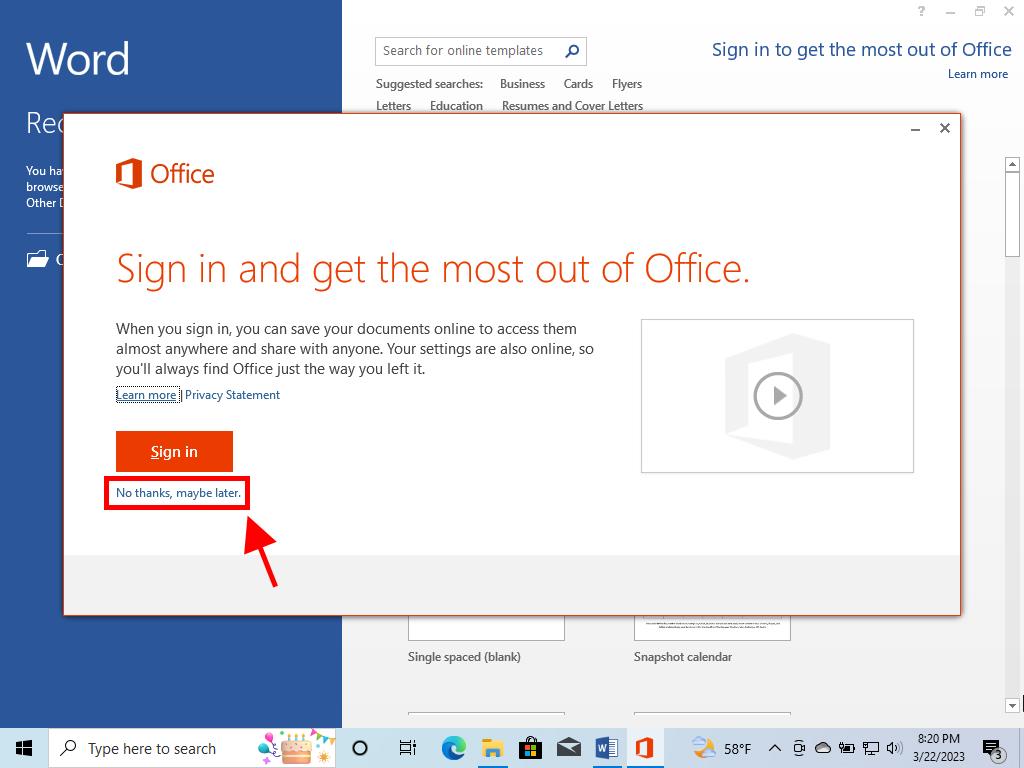
- Click on No, thanks. Maybe later in the following screen.

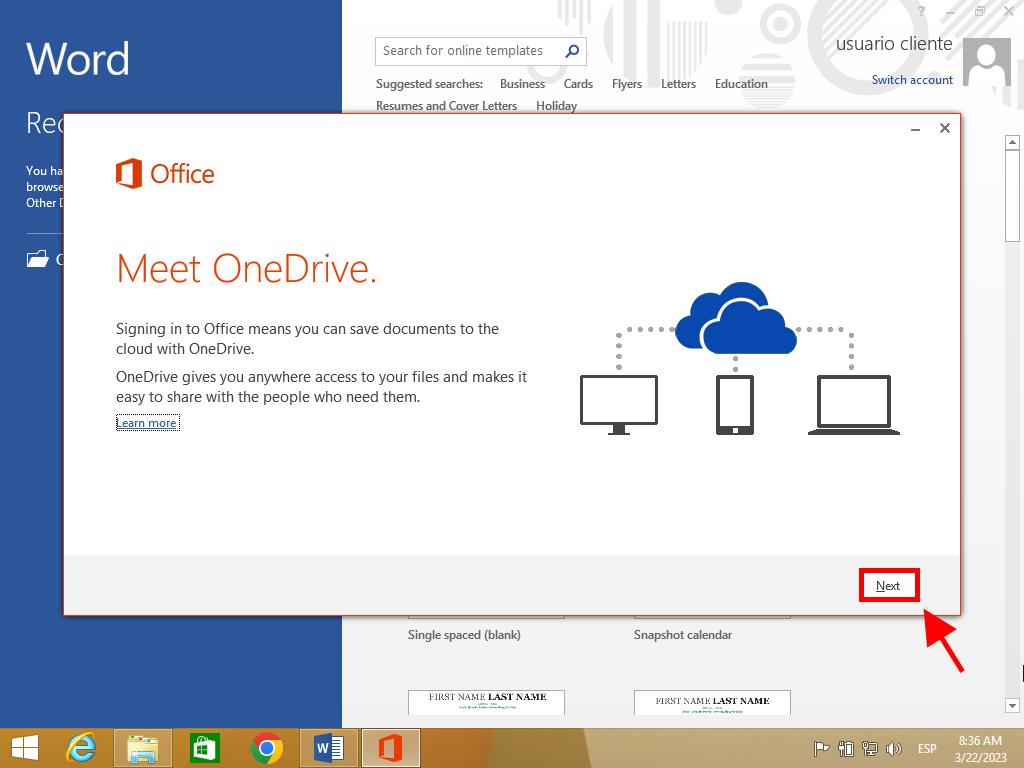
- Proceed by selecting Next.

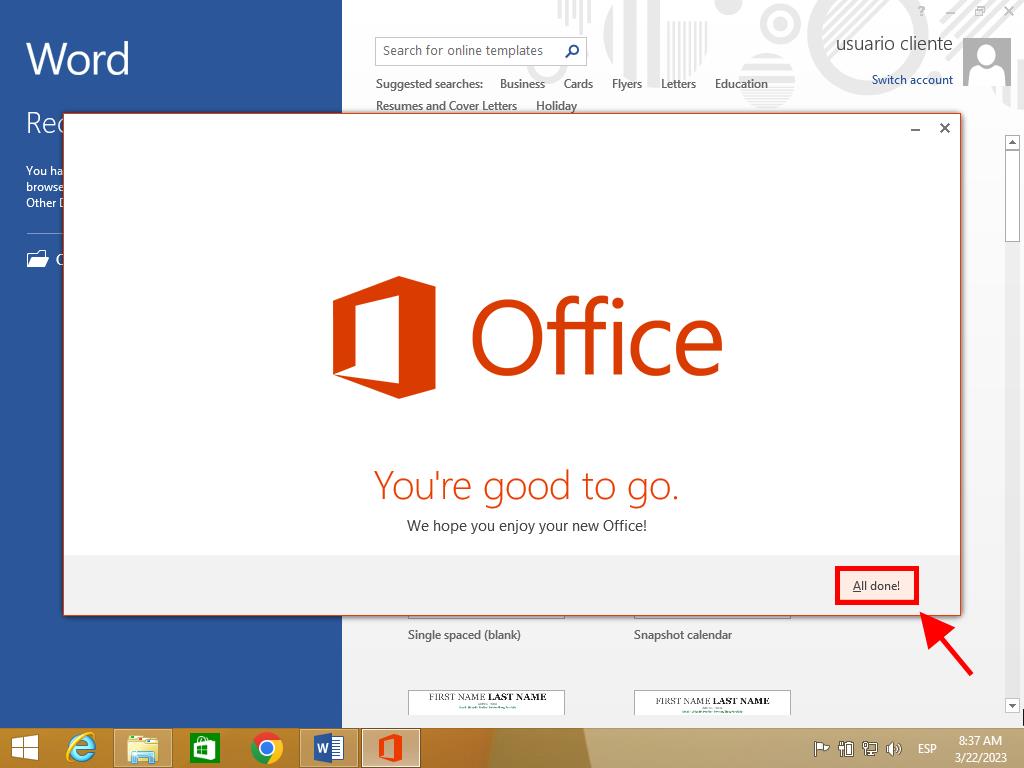
- Conclude by clicking on All done!.

- Your Office 2013 is now installed and ready for use.
Installing Office 2013 on Windows 7 and 8
Important: To activate Office 2013 on Windows 7 and 8, you must have a file compression tool installed on your PC, such as Winrar, Winzip, or 7 Zip. Here’s how:
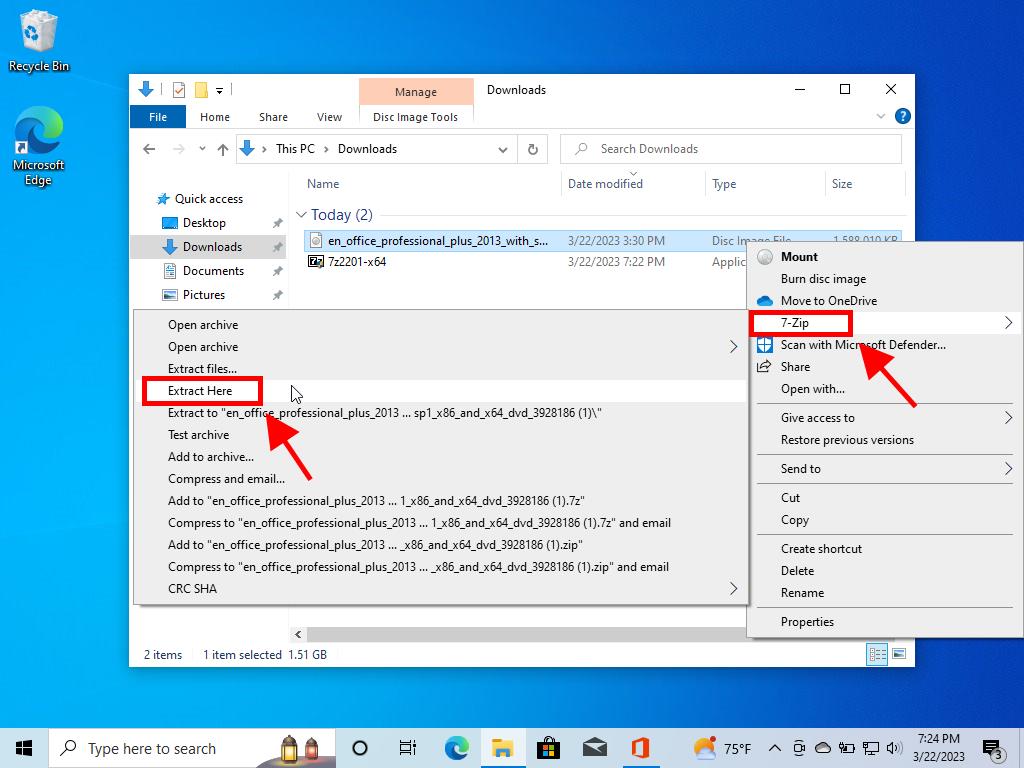
- Locate the downloaded Office 2013 .iso file, right-click, and choose 7 Zip, then select Extract here.

- At the window's bottom, double-click on the setup icon.

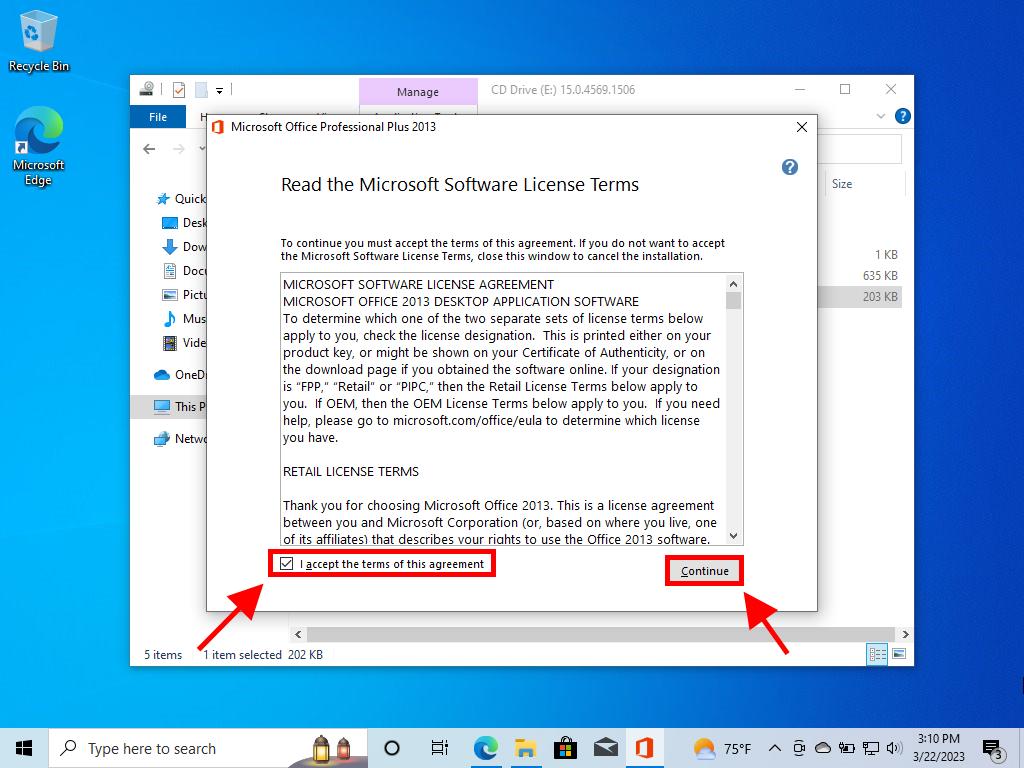
- Check the box to agree to the terms and select Continue.

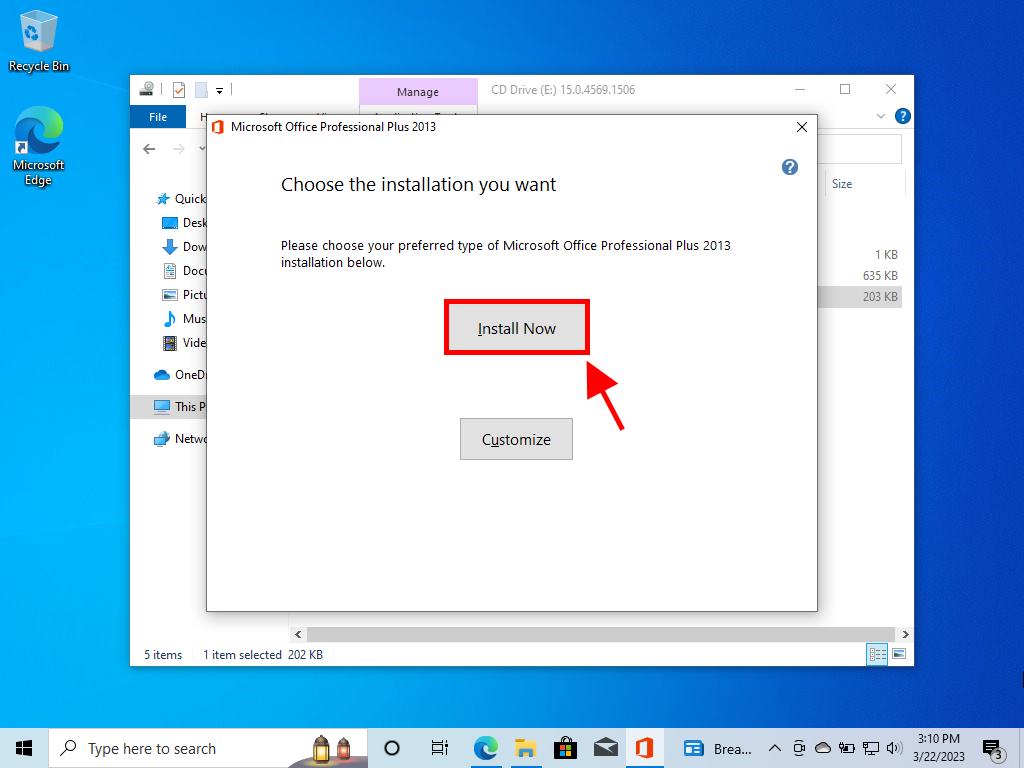
- Press Install now.

- Allow the Office installation to finish.

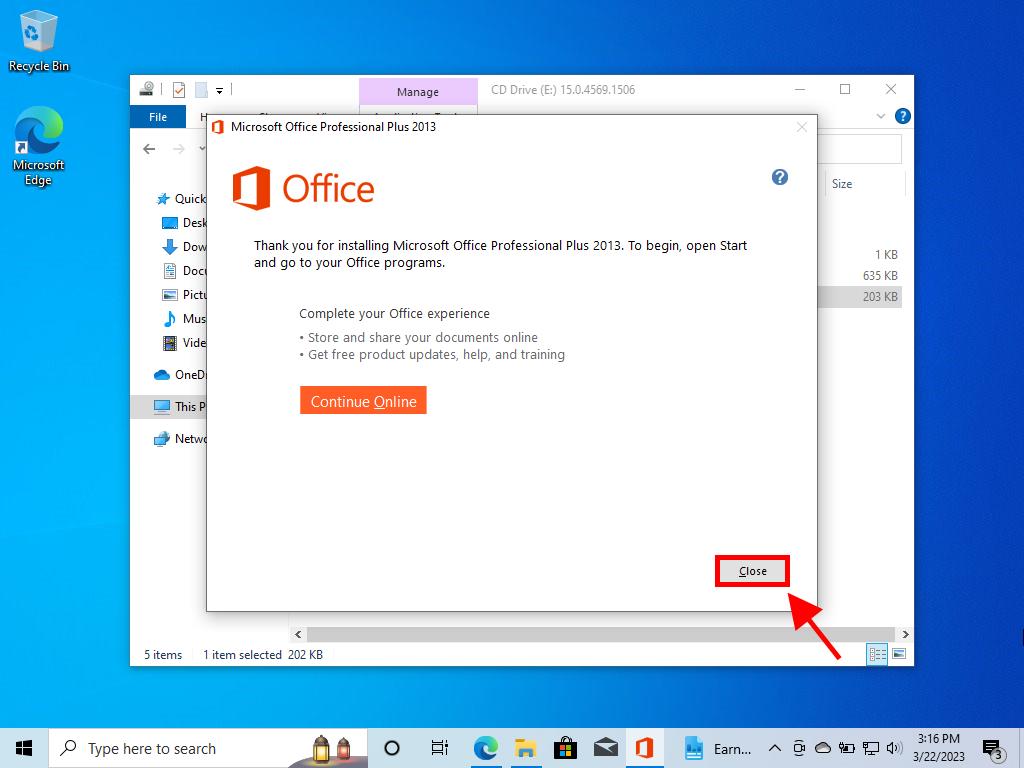
- Close the setup to finish.

- You've now successfully set up Office 2013 on your system.
 Sign In / Sign Up
 Orders
 Product Keys
 Downloads

 Go to notfound