Creating Bootable USB Media for Windows 11 Installation
After downloading the Windows 11 installation file (.iso), you can create a USB boot disk (also known as a pendrive) for installation purposes.
Note: You need a USB device with at least 16 GB of storage capacity.
You can use the following applications:
Rufus
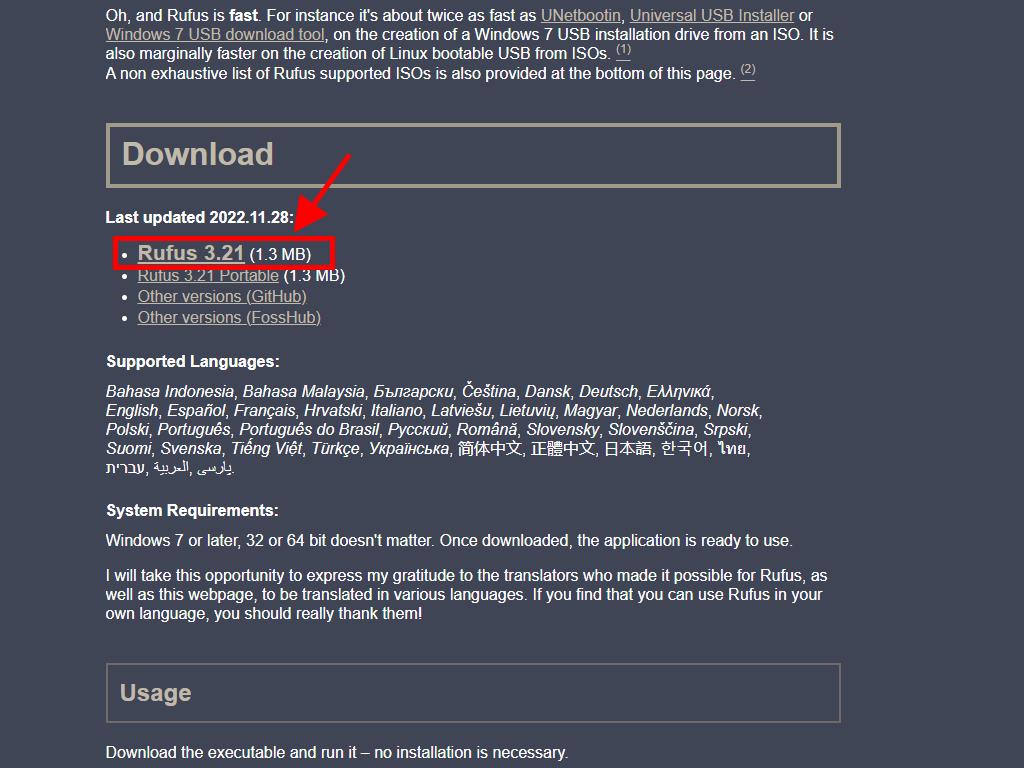
- Download Rufus for free here.
- Scroll down to the Download section and download the latest version of Rufus.
- Plug in your USB drive and open the Rufus application.
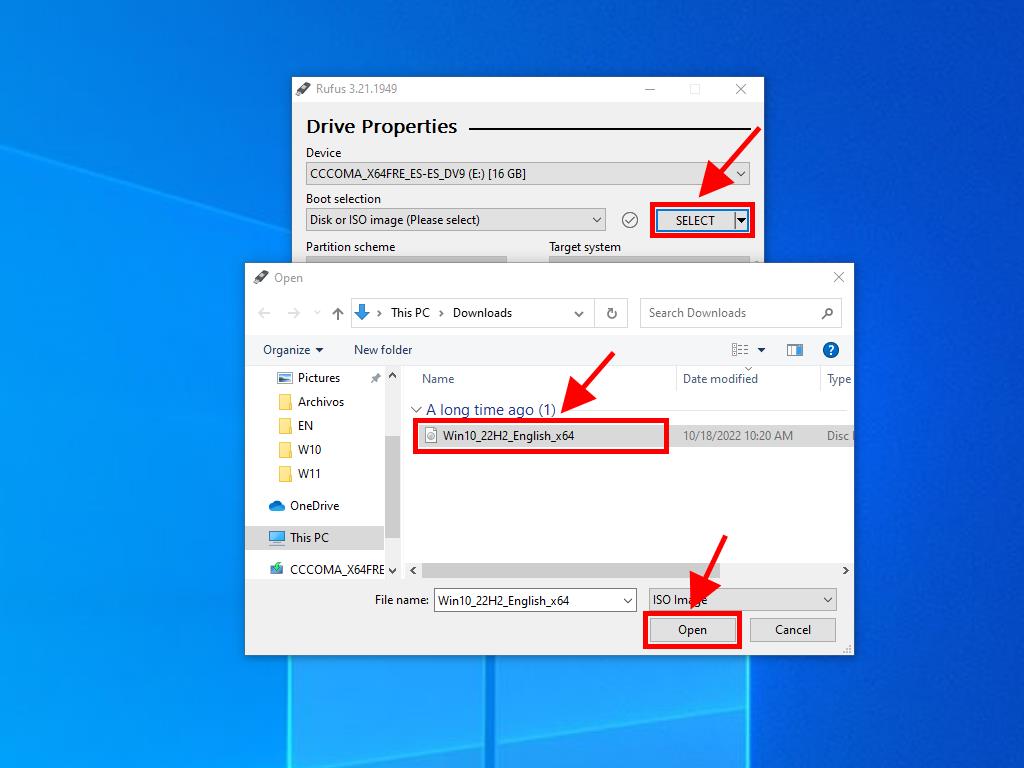
- Click Select and find the Windows 11 .iso file.
- Finally, click Start and wait for the bootable USB drive to be created.
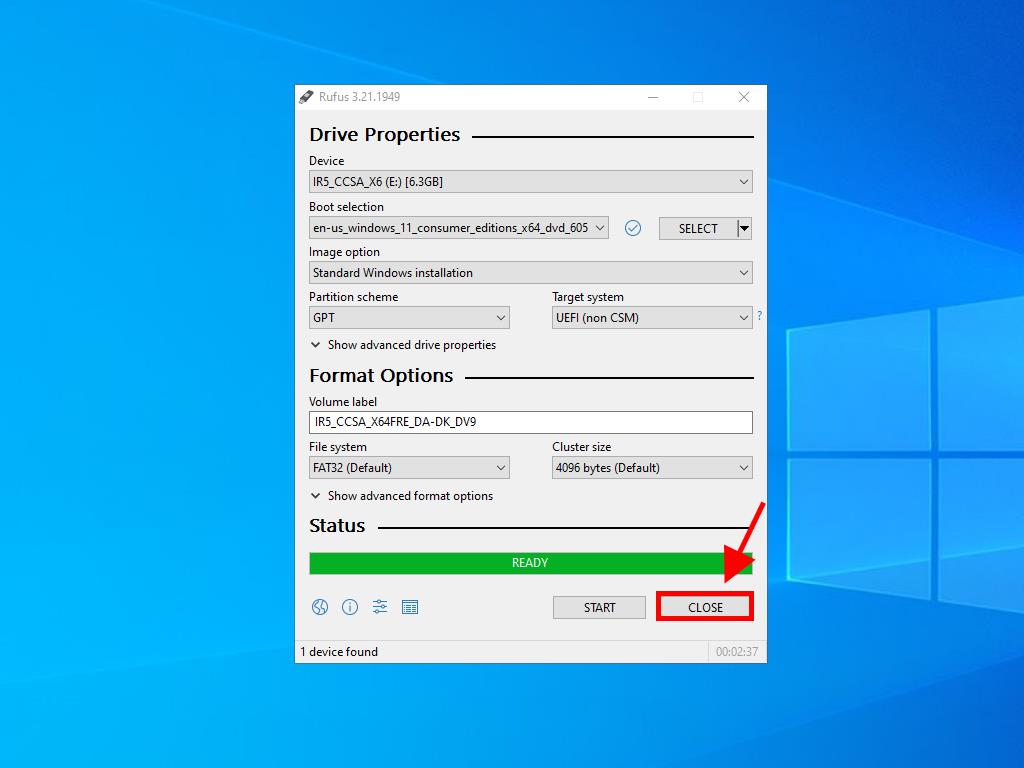
- When the process is complete (progress bar at 100%), click Close to finalise the creation of the USB drive.
Note: In the Customize Windows Installation pop-up, choose the Disable Data Collection option and wait for the process to complete.
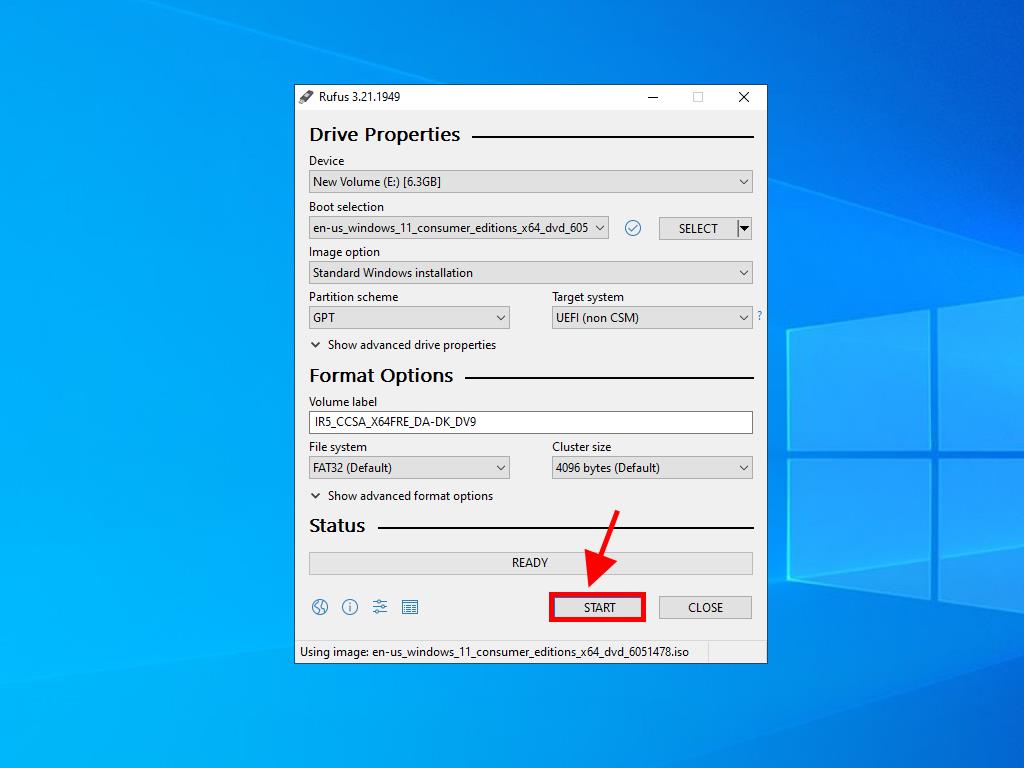
Note: For PCs released after 2020, choose the GPT partition scheme. For older PCs, select MBR.
MediaCreationTool
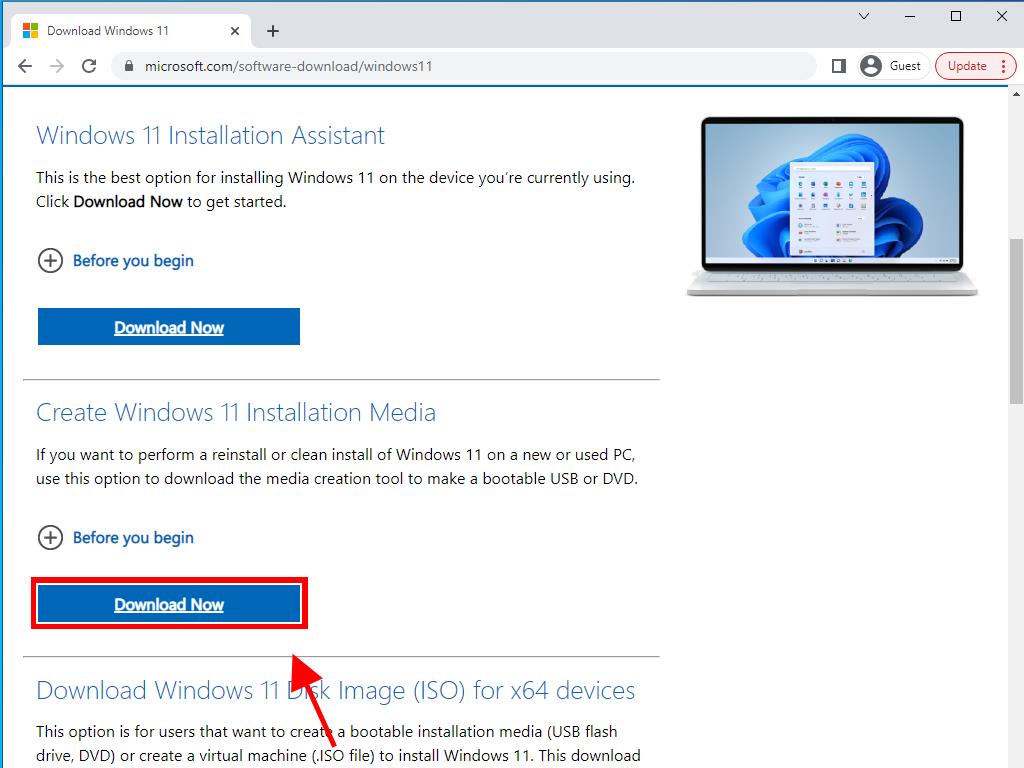
- Download it for free here.
- Click Download now.
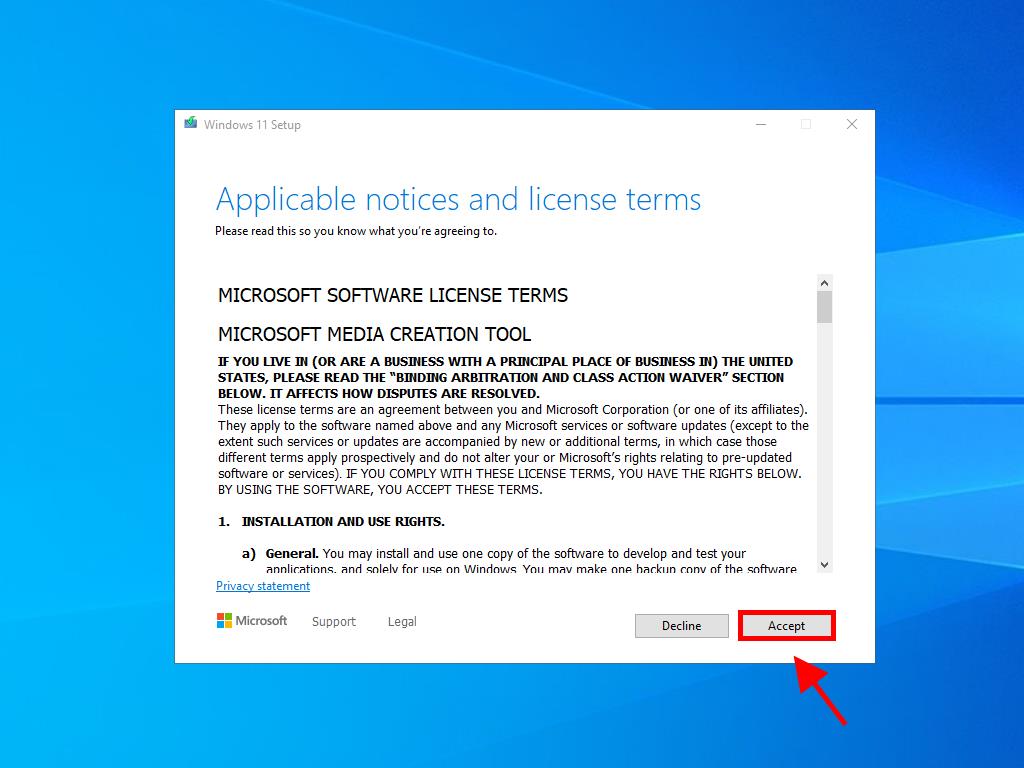
- Accept the terms and conditions to proceed with the installation, then click Accept.
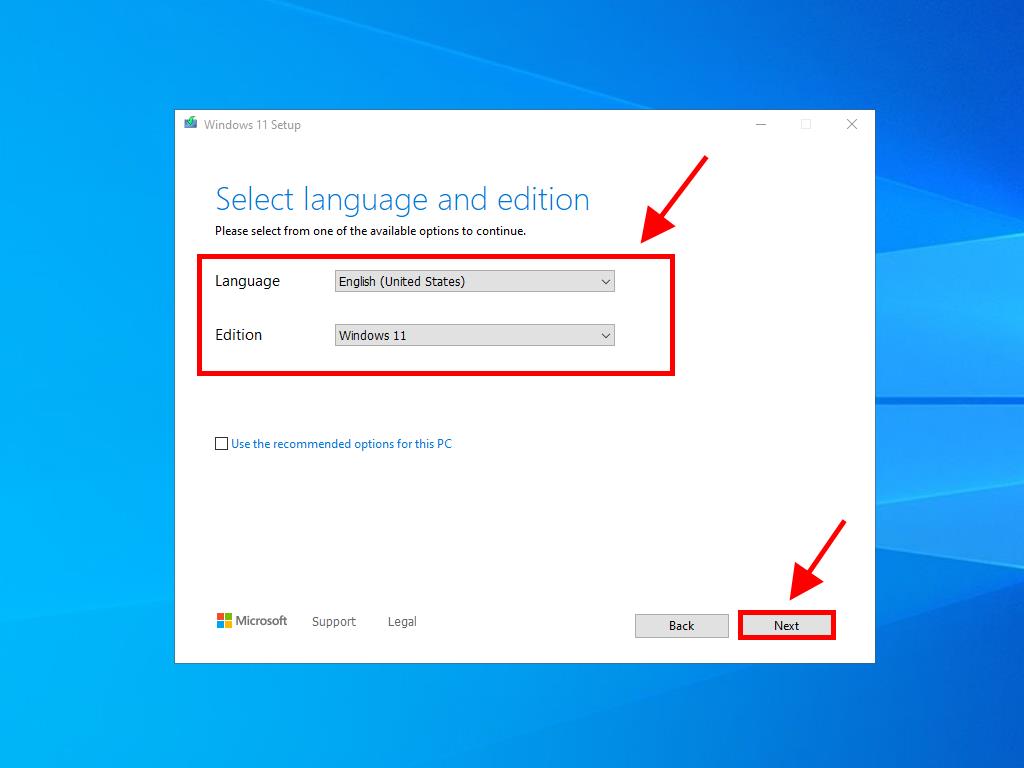
- Once you accept the terms, select the language and edition, then click Next.
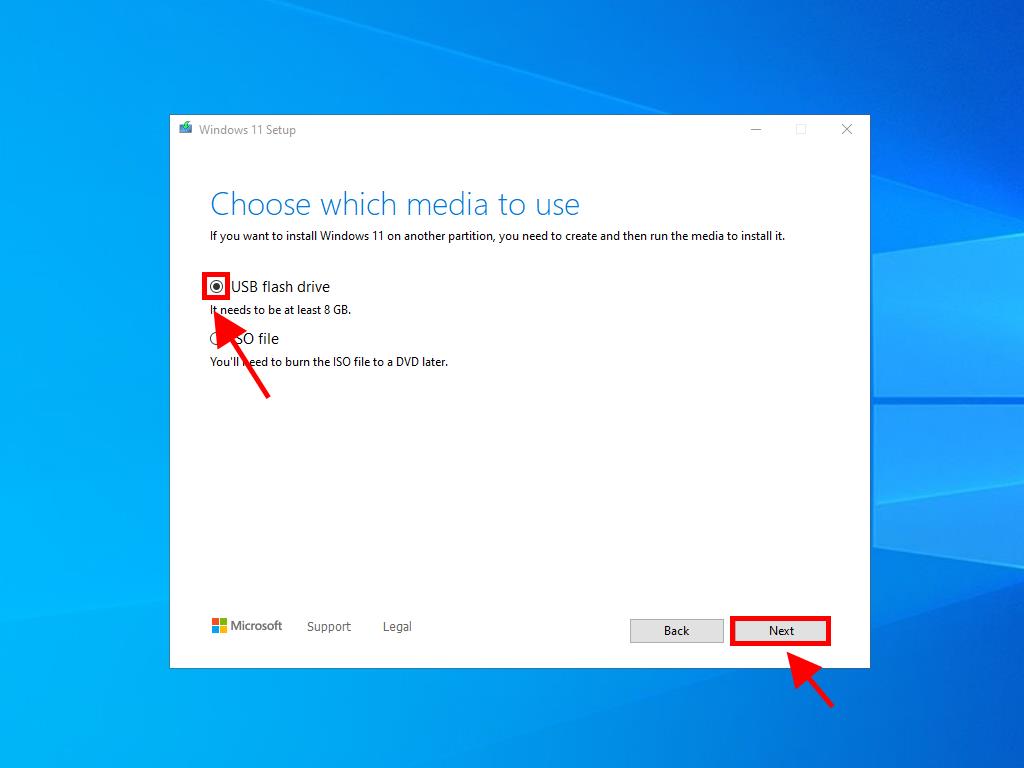
- Select USB flash drive.
- Click Next.
- This will start the download and configuration process on your USB drive.
Note: If you want to change the language or Windows edition, uncheck the Use the recommended options for this PC box.
Note: If your USB drive is not visible, close and restart the application without disconnecting the USB drive. Ensure you back up any data on the USB drive, as it will be erased during the process.
 Sign In / Sign Up
 Orders
 Product Keys
 Downloads

 Go to notfound