Sign In / Sign Up
 Orders
 Product Keys
 Downloads

 Go to notfound
Activating Your Windows Server 2016: Step-by-Step Guide
Go to the account section on our website. Hover over Profile to open a dropdown menu. Select Product Keys.
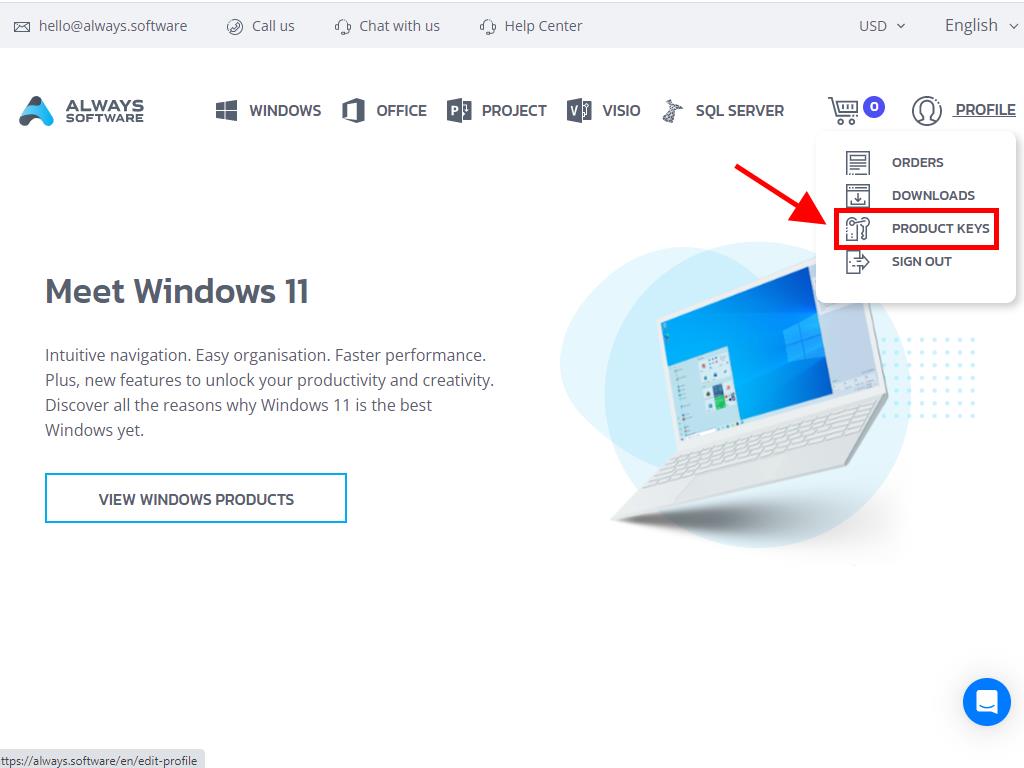
Here, you will find the product key necessary to activate Windows Server 2016.
If you are activating a previously installed Windows Server, ensure it is not in the evaluation period and follow these steps:
Note: It is recommended to download and install all software updates before beginning the activation process.
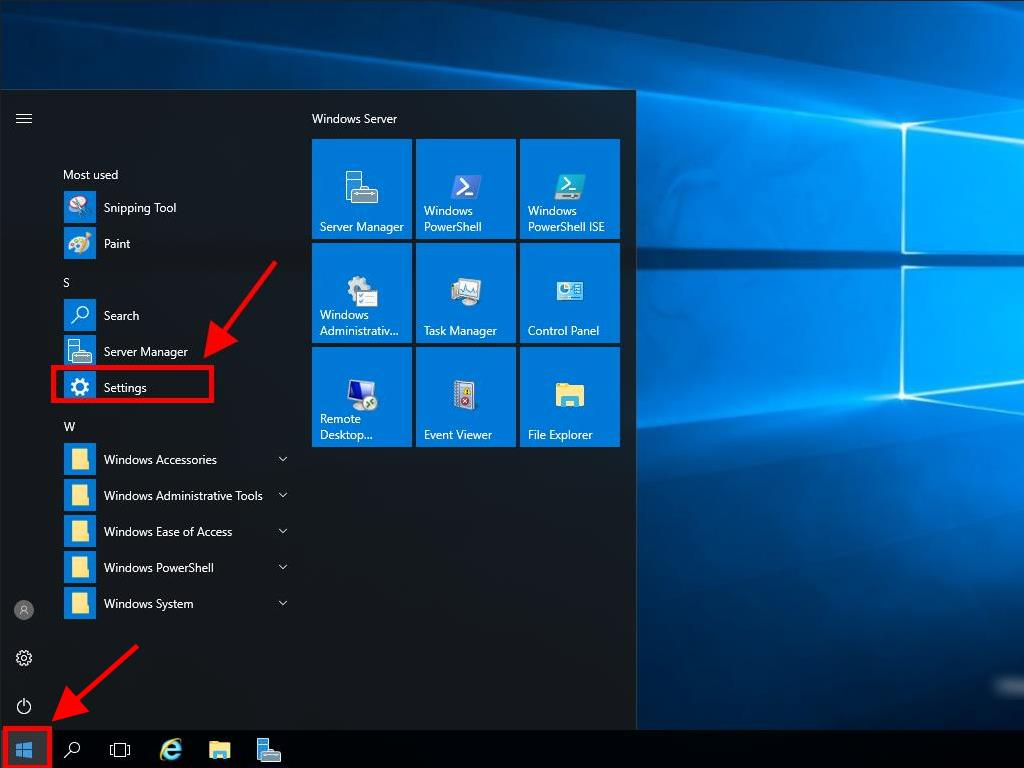
- After installing all available updates for Windows Server, select the Start button and click Settings.
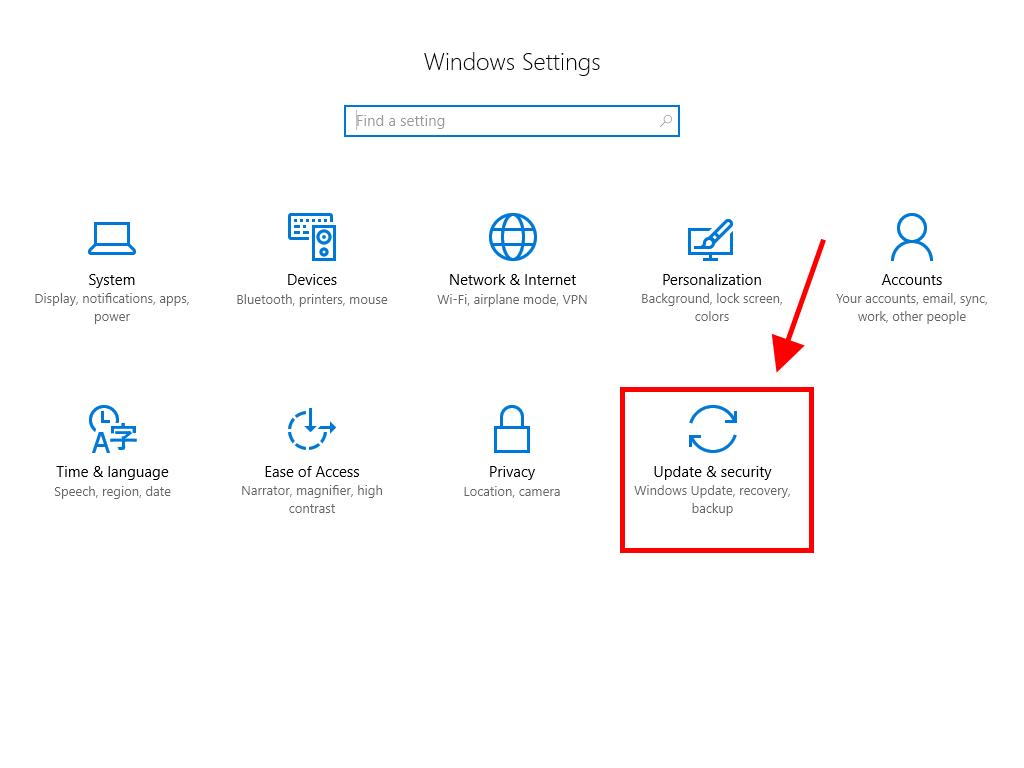
- Then, click Update & Security.
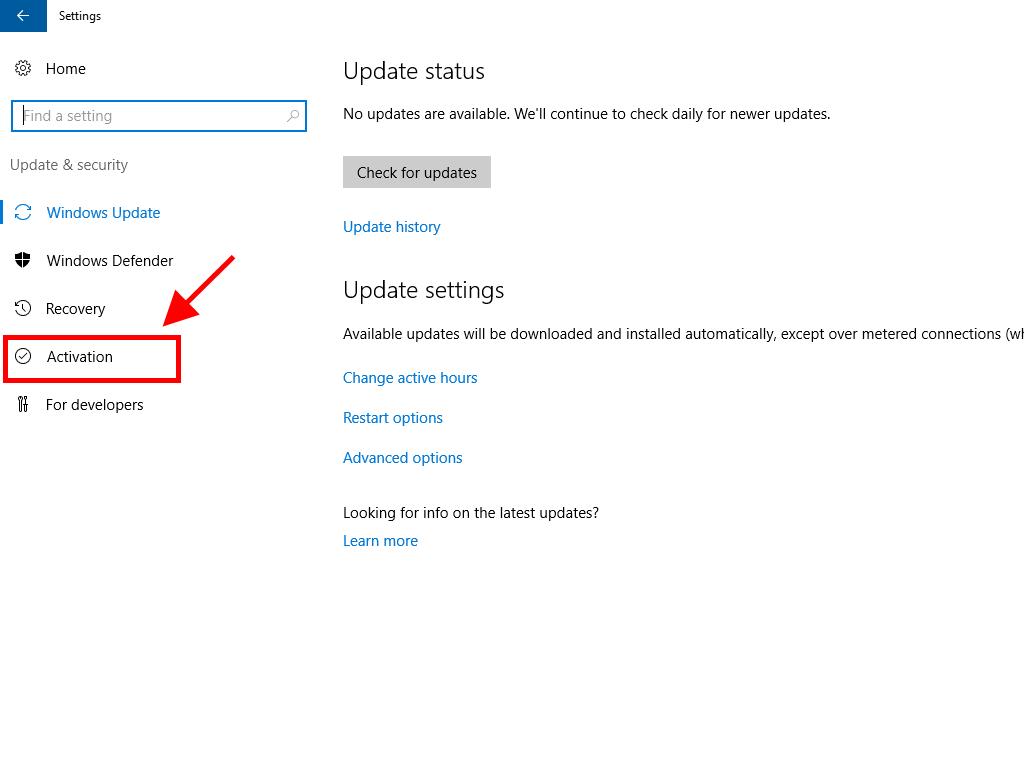
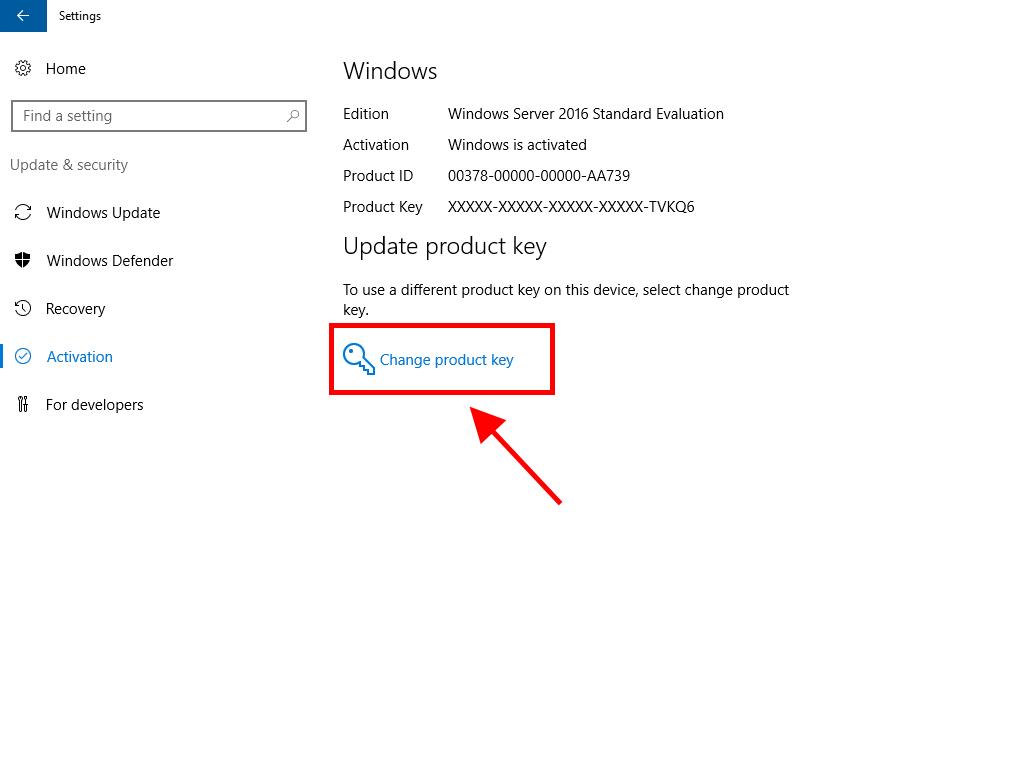
- Click Activation.
- Next, click Change product key.
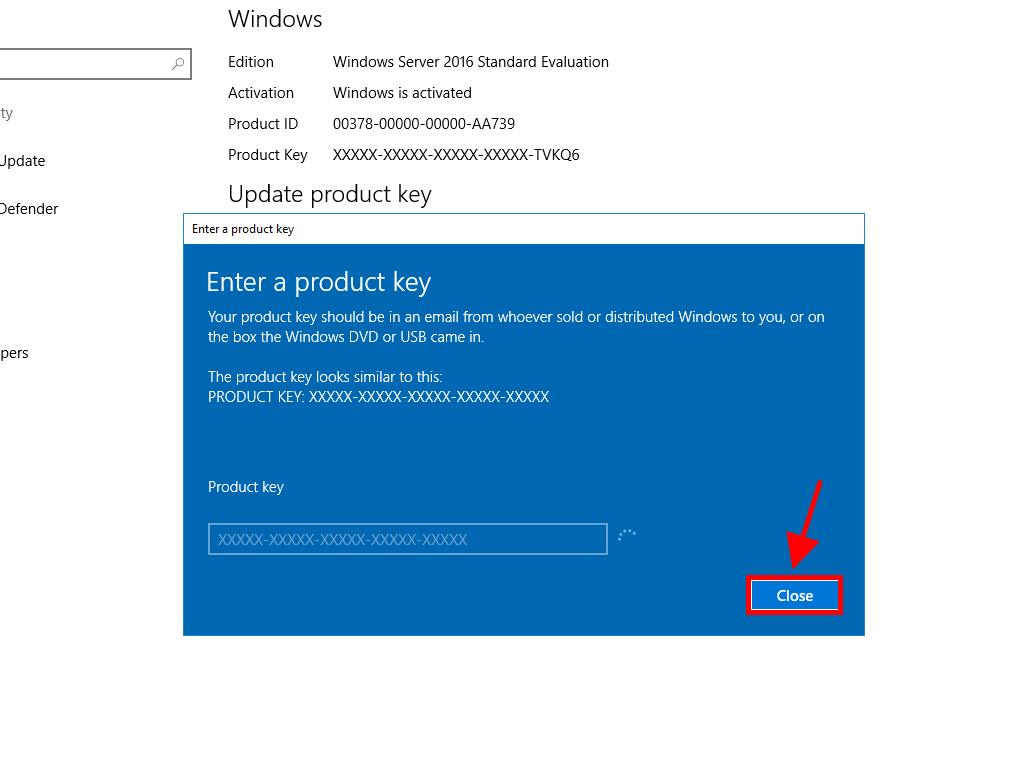
- Enter your product key. The licence will be recognised and activated automatically. Then, click Close.
Note: If you see the message The product key you entered didn't work. Check the product key and try again, or try a different one, your system might be an evaluation edition or the operating system may be installed on a different activation channel. Contact one of our agents for help. For personalised assistance, click here.
If your system is an evaluation edition, follow these steps:
Note: Ensure the server has all updates installed to avoid errors during activation.
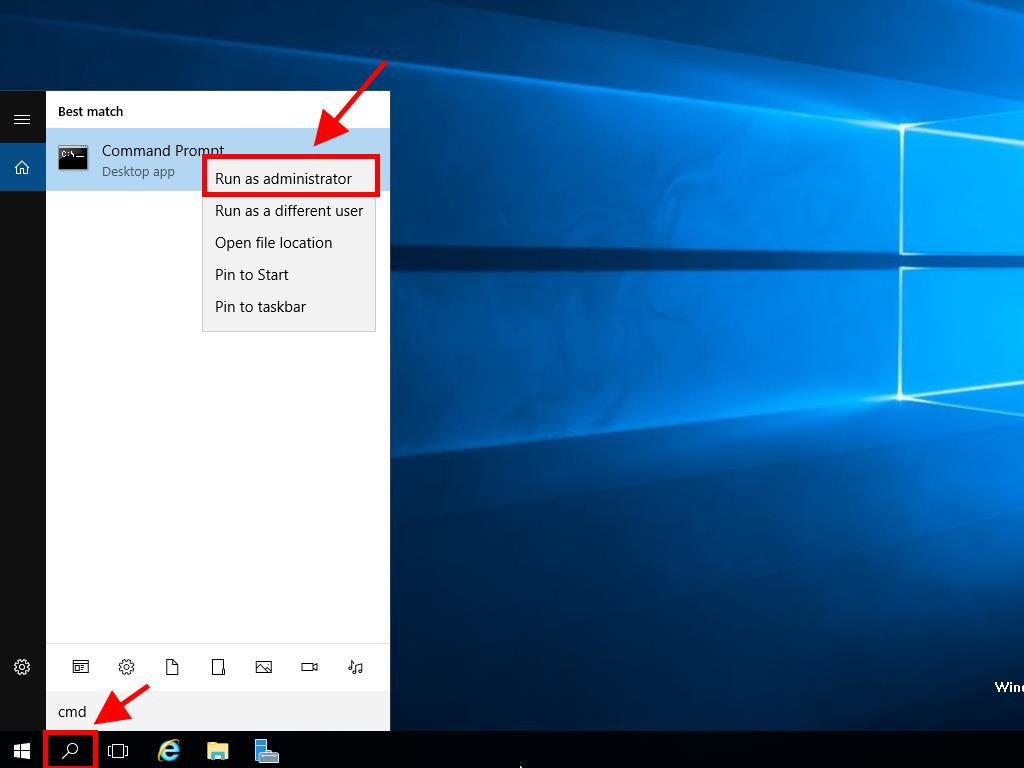
- In the taskbar search box, type CMD. The Command Prompt will appear. Right-click and select Run as administrator.
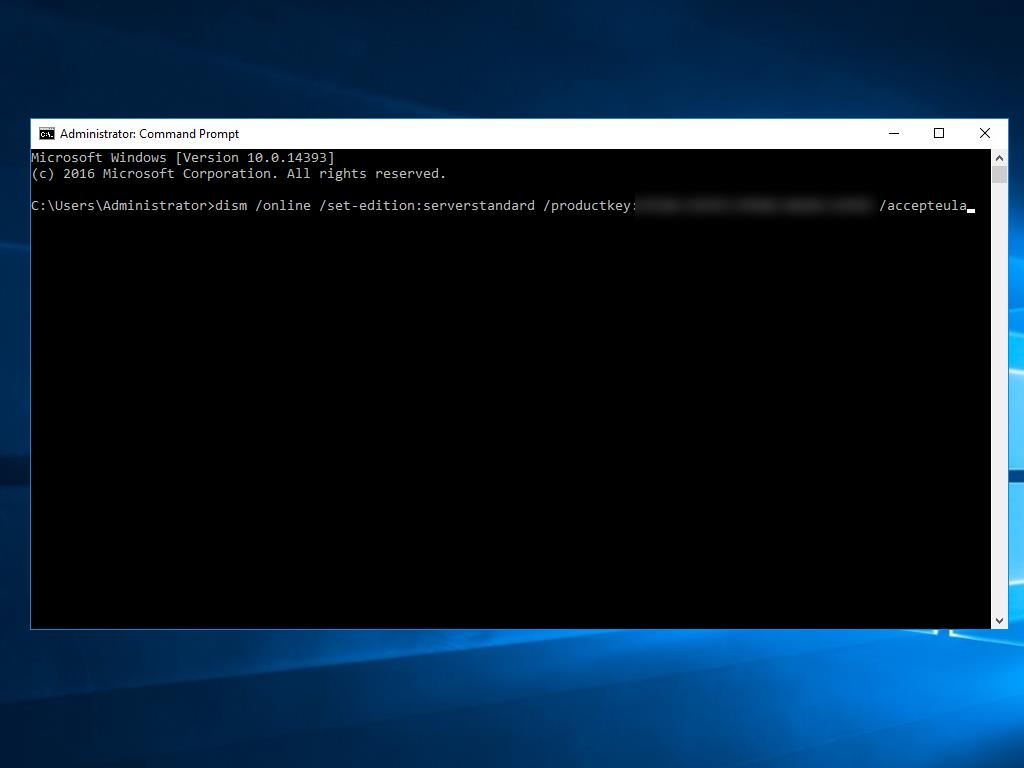
- In the box, type: dism /online /set-edition:serverstandard /productkey:XXXXX-XXXXX-XXXXX-XXXXX-XXXXX /accepteula. Replace the Xs with your product key and press Enter.
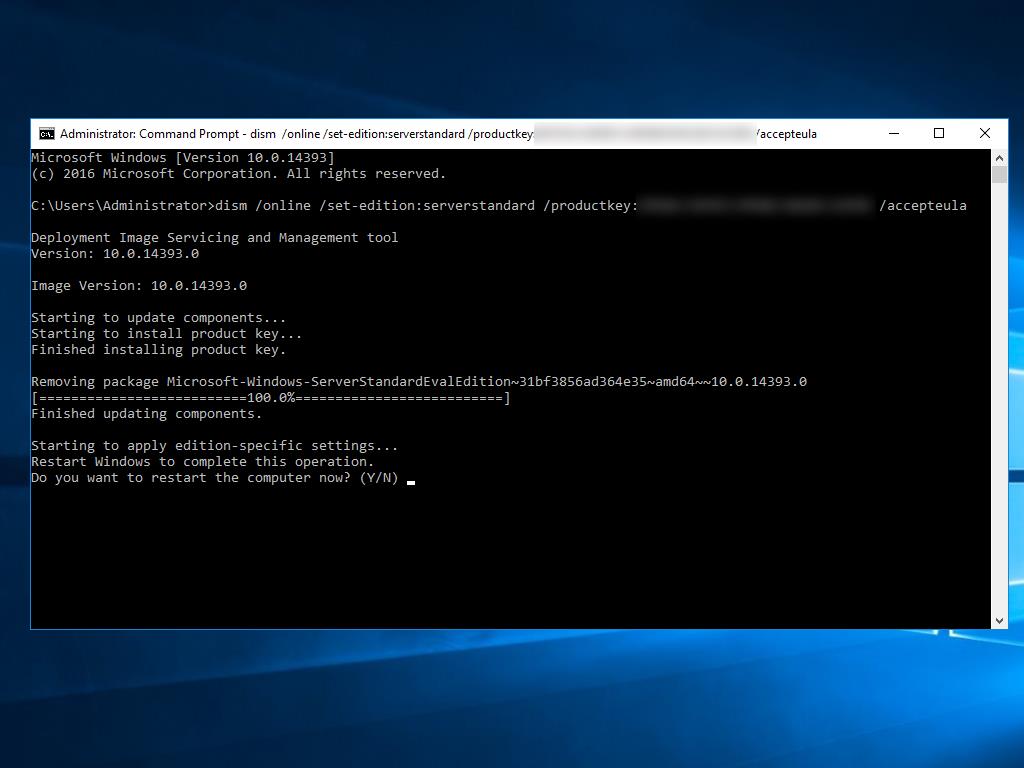
- After the activation process, restart the server.
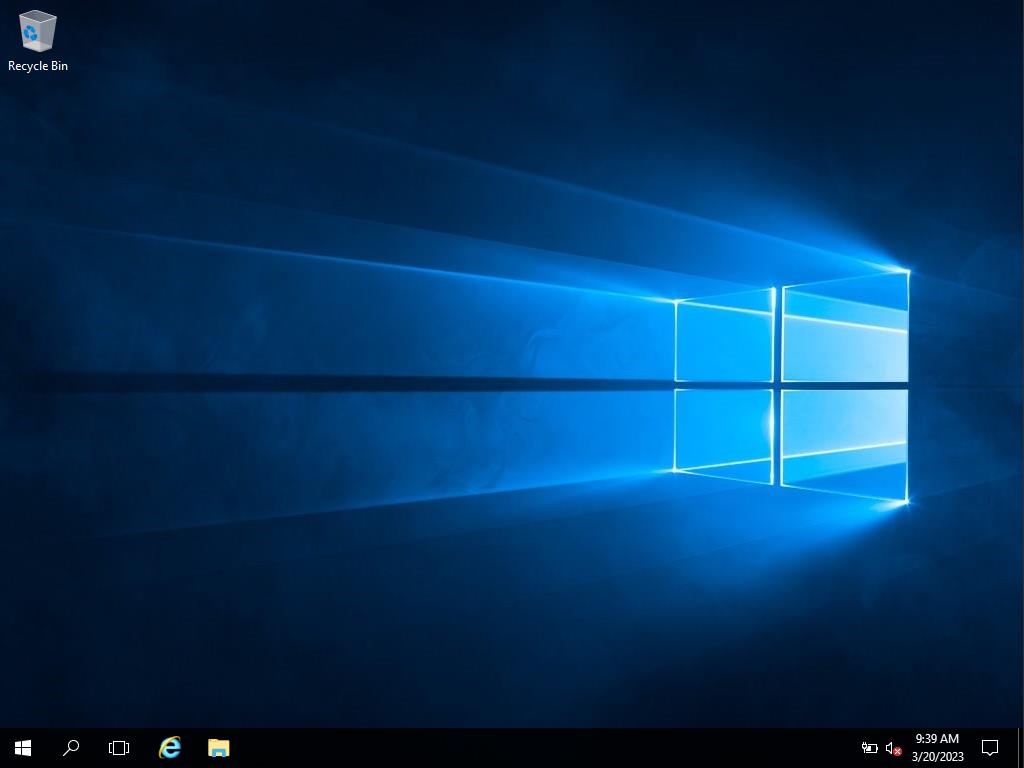
- After restarting, your Windows Server 2016 will be activated. You can verify this in the bottom right corner, where the Windows Server Standard Evaluation mark will no longer be visible.