 Sign In / Sign Up
 Orders
 Product Keys
 Downloads

 Go to notfound
Step-by-Step Guide: Installing Windows Server 2016 on VirtualBox
To set up VirtualBox on your computer, proceed with the following:
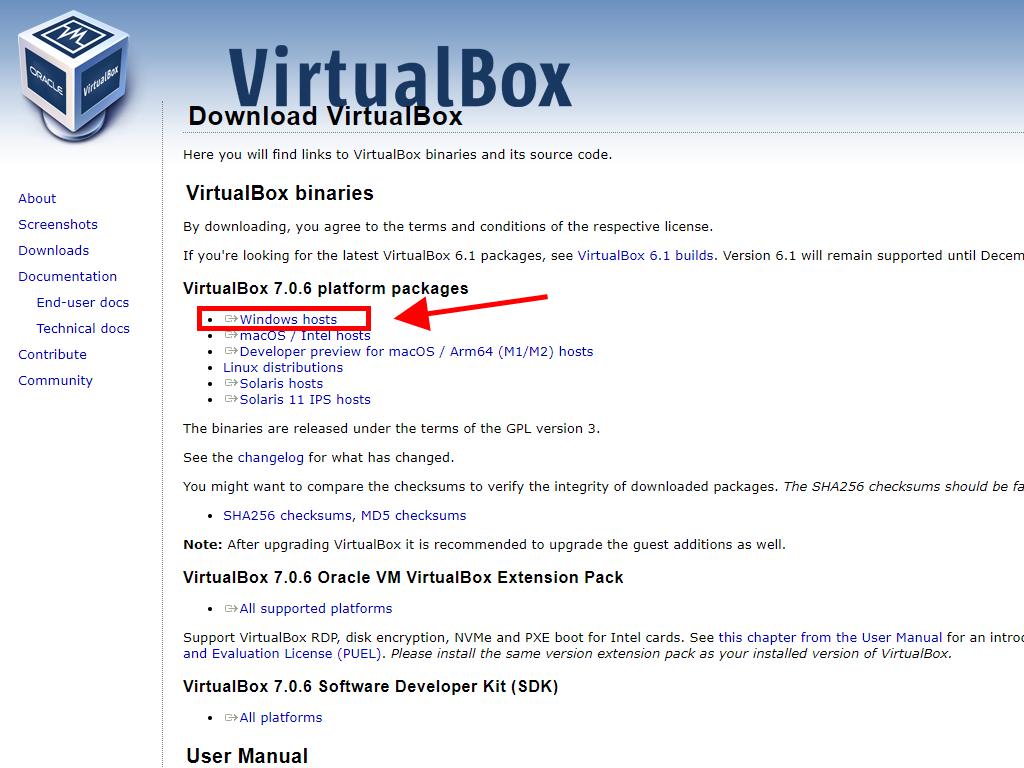
- Visit this link and choose the Windows Hosts option.
- The download of VirtualBox will commence on your system.
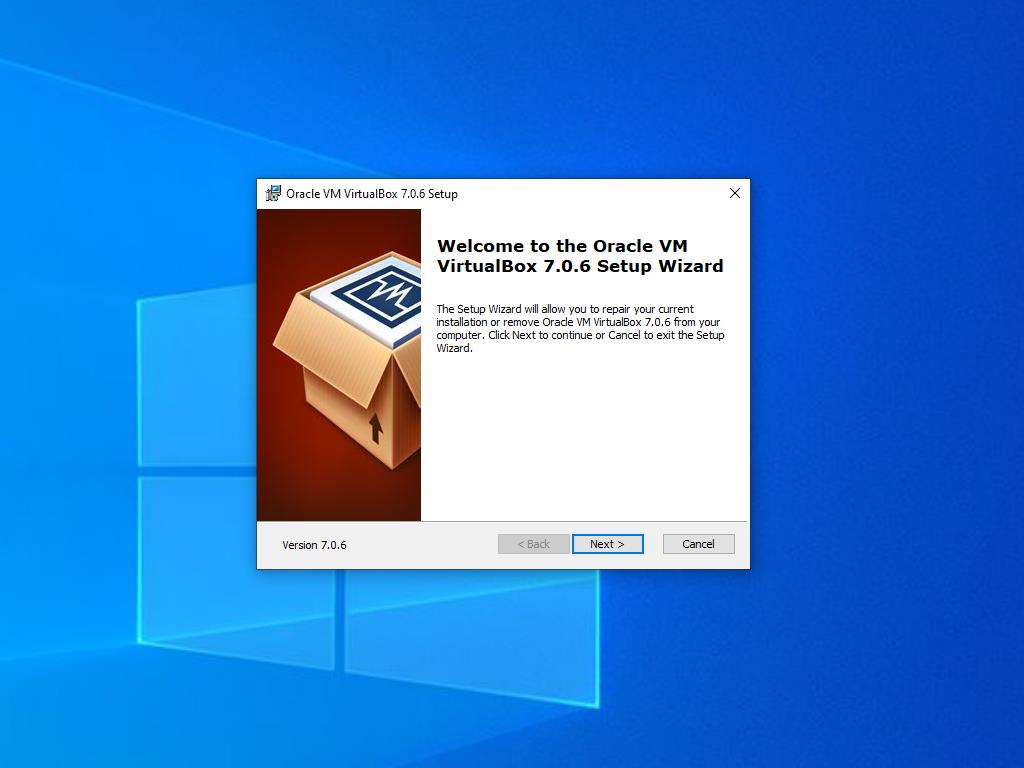
- Execute the downloaded VirtualBox setup and follow the installation prompts.
Tip: If you encounter any setup issues with VirtualBox, opt-out of USB features during installation.
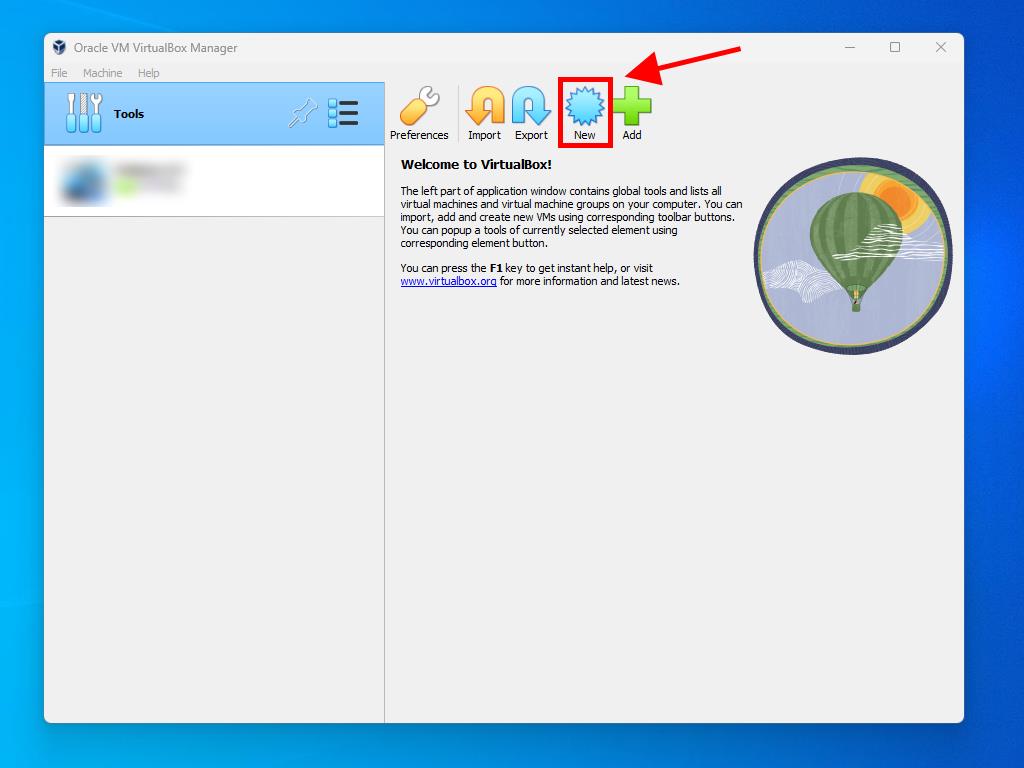
To create a new virtual machine using VirtualBox, follow these steps:
- In the Machine menu, hit the New button.
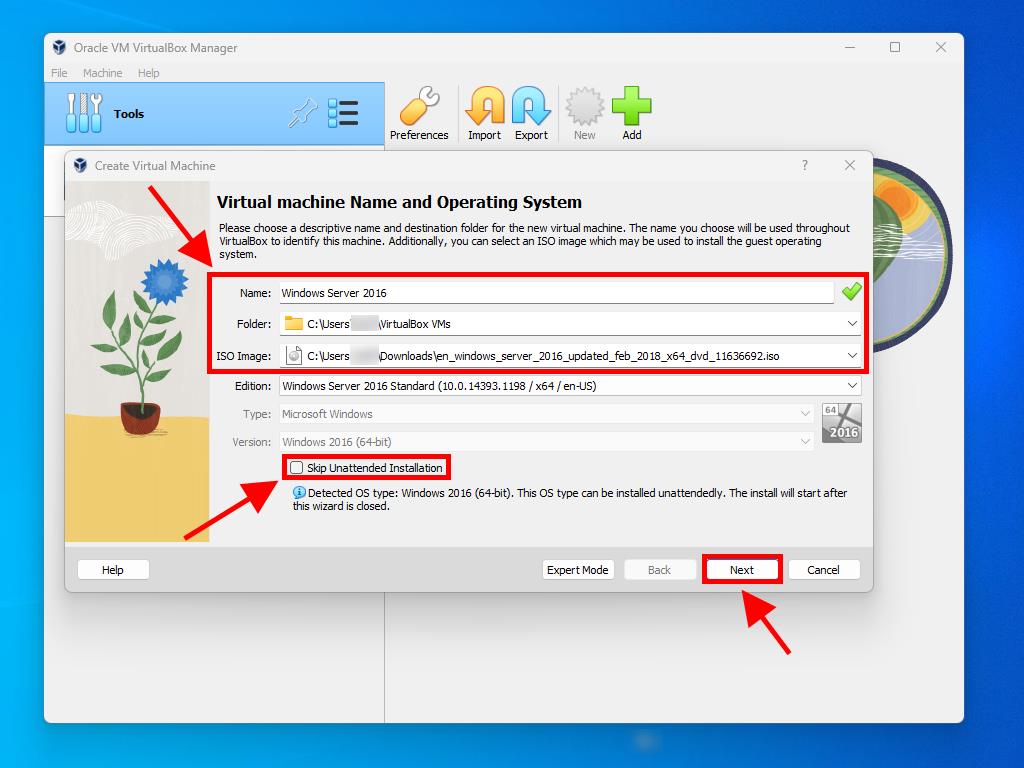
- Name your Virtual Machine, specify the location for the Windows Server .iso file, and then proceed by clicking Next.
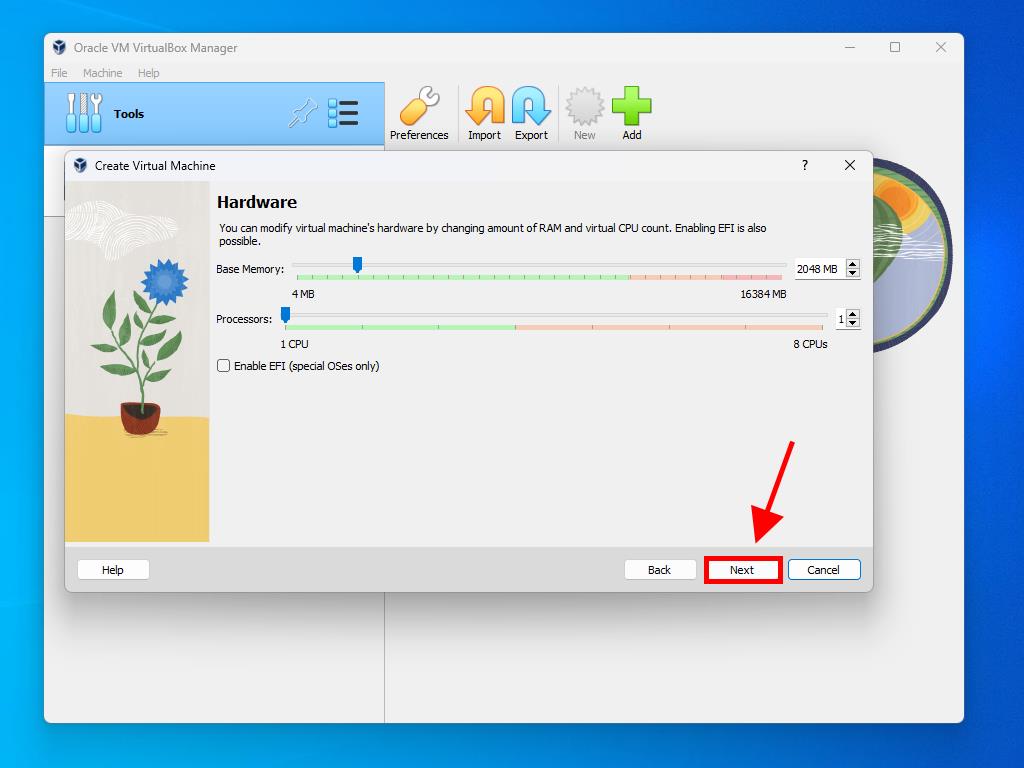
- Allocate a minimum of 4 GB of RAM and continue with Next.
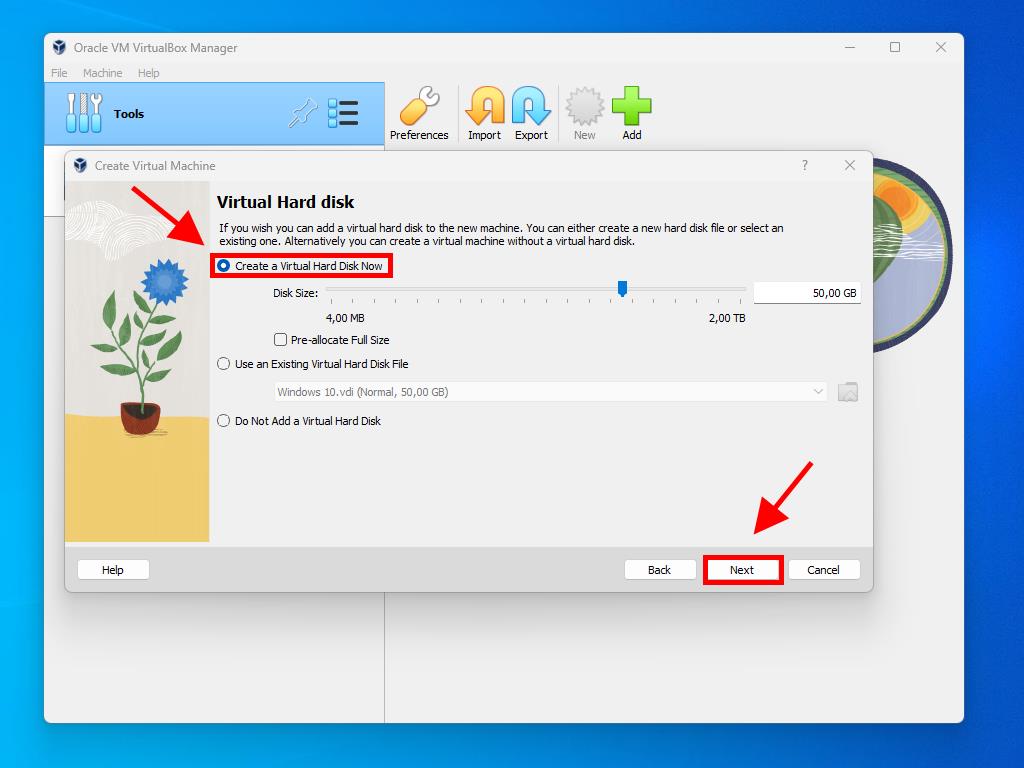
- Opt to Create a Virtual Hard Disk Now, recommending a minimum size of 50 GB, and click Next.
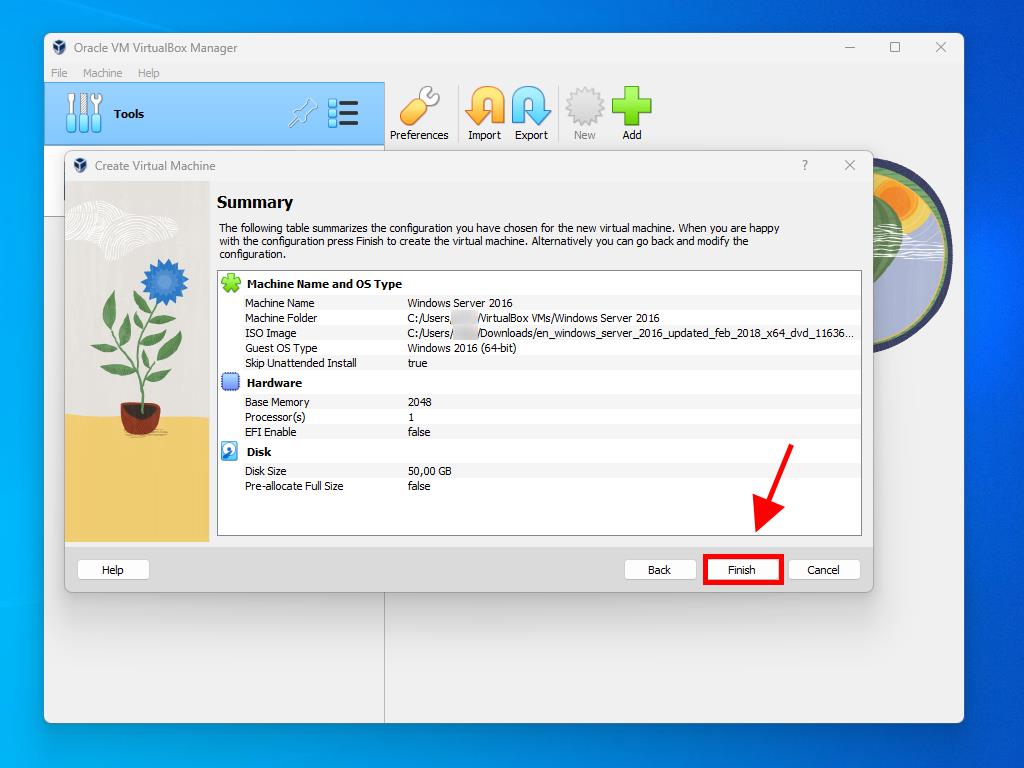
- After reviewing the settings in the Summary window, finalize by clicking Finish.
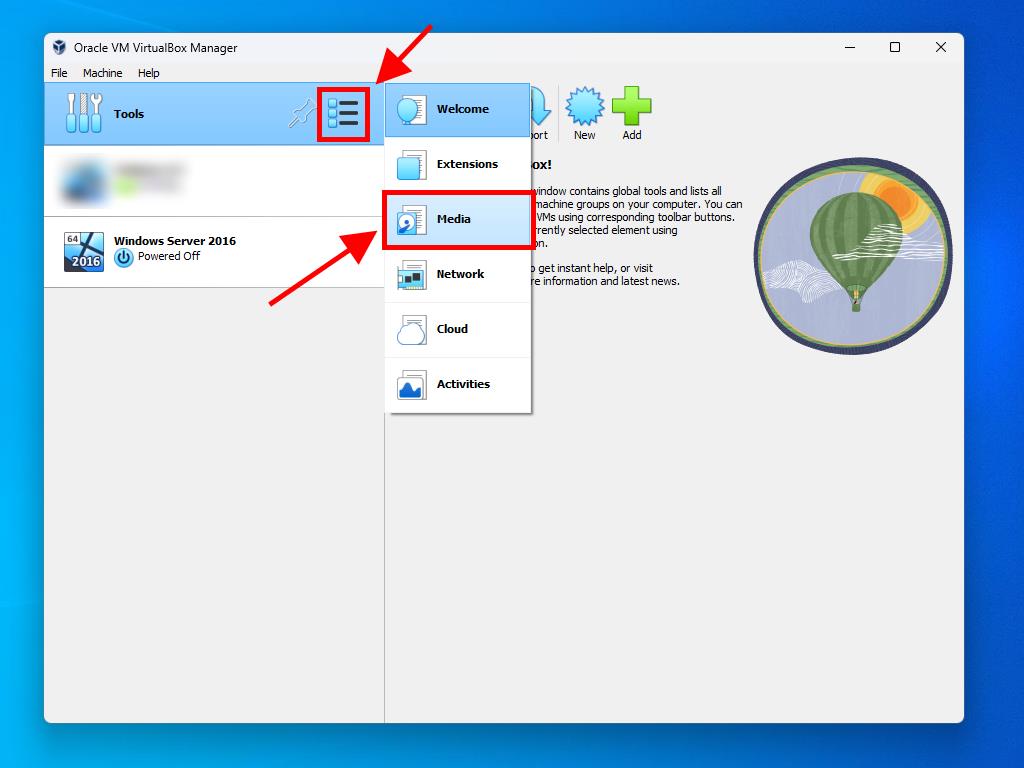
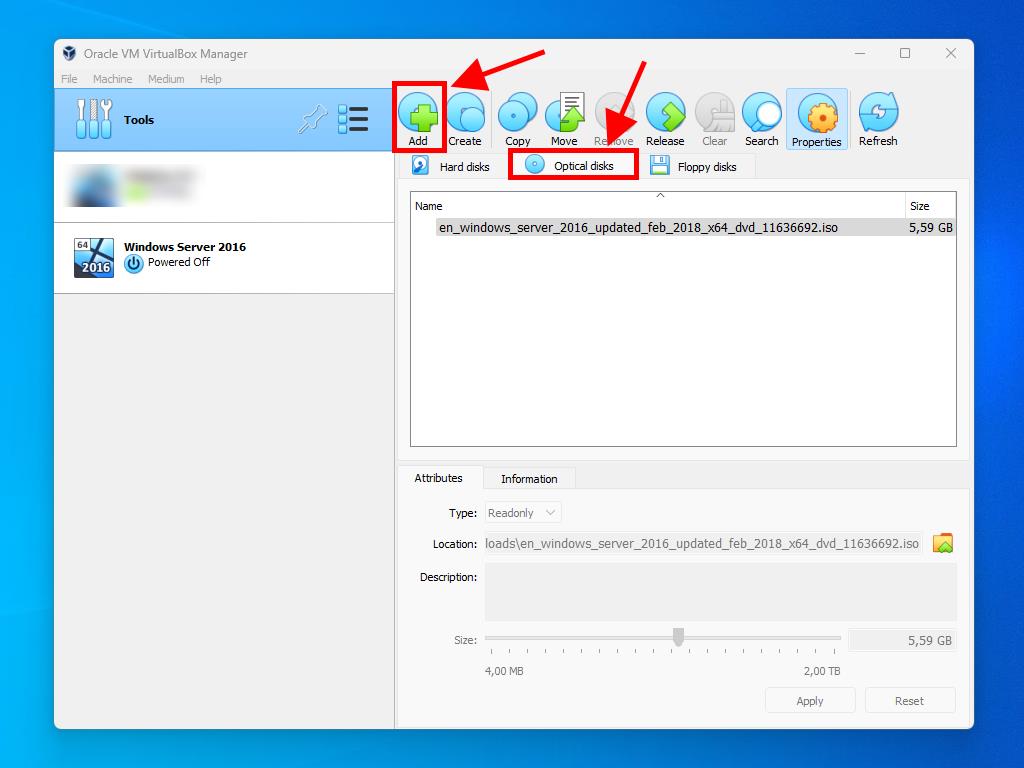
- In the Tools section, access the Windows Server .iso by clicking the ellipsis button. A dropdown will appear; select Media.
- Click on the Optical Disks tab and press Add.
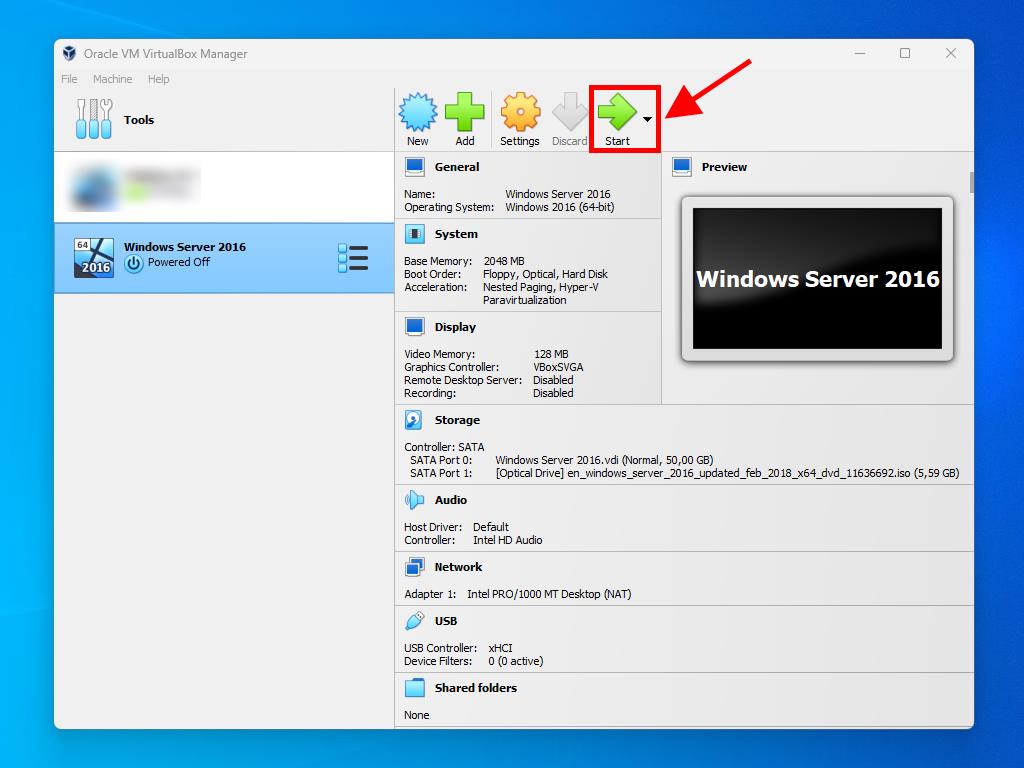
- Initiate the virtual machine by selecting Start.
- The installation process for Windows Server 2016 will start.
Note: Avoid automatic installation by deselecting Skip Unattended Installations.
Hint: Adjust the RAM value based on your system specifications and requirements.
For detailed guidance on Windows configuration, see our article: How to Configure Windows Server 2016?.